Table of Contents
Introduction:
In this tutorial I am going to give an introductory example of using stripe for the e-commerce project, basically you can follow this tutorial if you want to sell something online that can be any product and you want to accept payment online using cards, then this tutorial is for you, at the end of this tutorial you are you going to learn implementation of stripe payment gateway into your php Laravel application.
What is Stripe?
Very popular and secure internet payment gateway company which helps to accept payment worldwide.
Stripe provide really good development interface to start, you don’t have to pay subscription charges to learn it provides free developer account, before starting to code will have register on stripe to get API keys, go ahead and create new account and get the secret key and API keys in place.
Have look at the attached screen, showing detail stripe interface to get stripe API key and secrete keys:

Create new PHP Laravel Application:
I assume you have your php Laravel environment setup ready to use for development along with composer, use following command to create new project with Laravel installer or composer.
$ laravel new stripe-demo
OR
$ composer create-project --prefer-dist laravel/laravel stripe-demo
Install Stripe PHP API library
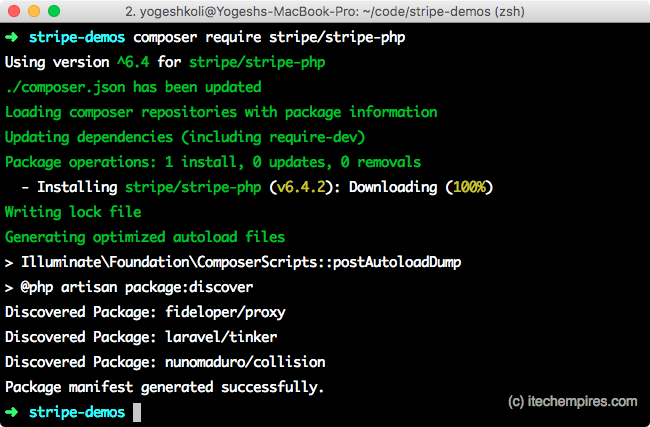
Next we need to pull in stripe php library to access stipe api from the backend also to make payment and so on, so let’s install it with compose using command below:
$ composer require stripe/stripe-php
Add API keys to project:
Let’s open the project into the code editor and the first step we will do is to add stipe api keys in to environment variable file as showing below, open up .env file:
STRIPE_KEY=YOUR-APP-STRIPE-KEY
STRIPE_SECRET=YOUR-APP-STIPE-SECRET-KEY
Sample Checkout Form:
Now we will create a sample checkout form where will have simple Book name and price of the product along with the “Pay with Card” button, to do that open welcome.blade.php file and add following script:
<!doctype html>
<html lang="{{ app()->getLocale() }}">
    <head>
        <meta charset="utf-8">
        <meta http-equiv="X-UA-Compatible" content="IE=edge">
        <meta name="viewport" content="width=device-width, initial-scale=1">

        <title>Stripe Demo</title>

        <!-- Fonts -->
        <link href="https://fonts.googleapis.com/css?family=Raleway:100,600" rel="stylesheet" type="text/css">


    </head>
    <body>

        <h1>Test Book</h1>

        <h3>$10.00</h3>

        <form action="/make-payment" method="POST">
            {{ csrf_field() }}
        <script
            src="https://checkout.stripe.com/checkout.js" class="stripe-button"
            data-key="{{ config('services.stripe.key') }}"
            data-amount="1000"
            data-name="Demo Book"
            data-description="This is good start up book."
            data-image="https://stripe.com/img/documentation/checkout/marketplace.png"
            data-locale="auto">
        </script>
        </form>
    </body>
</html>
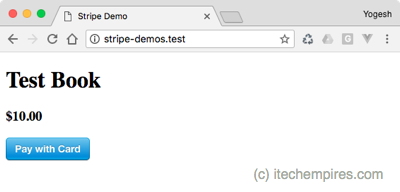
When you open up your project it show you something like image showing below, it will allow you to open the quick popup for the payment:
So we are almost ready with our very simple UI for demonstration, in your application you can easily add checkout button along with shopping cart or along with the order details page it up to you and your requirements, here we are going to use real simple demo page to make things easy to understand.
If you look the script above we have <form> tag along with action of “/make-payment” if you understand that is actually going to form request that will have to handle while creating payments, let’s see it real-time in next step.
Create Payment Route:
As I said, we are going to need a route to handle incoming post request from stipe pay with card button and payment form, keep in mind the that form is going to send us and post request along with some data which we are going to need while creating/making payment server-side using stipe api library.
Go ahead and open web.php routes file and following line at the end of the file:
<?php

Route::post('/make-payment', 'PaymentsController@pay');
use following command to create new Create new Controller to handle router request:
$ php artisan make:controller PaymentsController
Add following method into the controller:
PaymentsController.php:
<?php

namespace App\Http\Controllers;

use Illuminate\Http\Request;
use Stripe\Stripe;
use Stripe\Charge;

class PaymentsController extends Controller
{
    public function pay(Request $request)
    {
        Stripe::setApiKey(config('services.stripe.secret'));

        $token = request('stripeToken');

        $charge = Charge::create([
            'amount' => 1000,
            'currency' => 'usd',
            'description' => 'Test Book',
            'source' => $token,
        ]);

        return 'Payment Success!';
    }
}
After adding this controller we are almost ready to test our first part of implementation, you can test as well if you followed all steps from the tutorial:
Test the application:
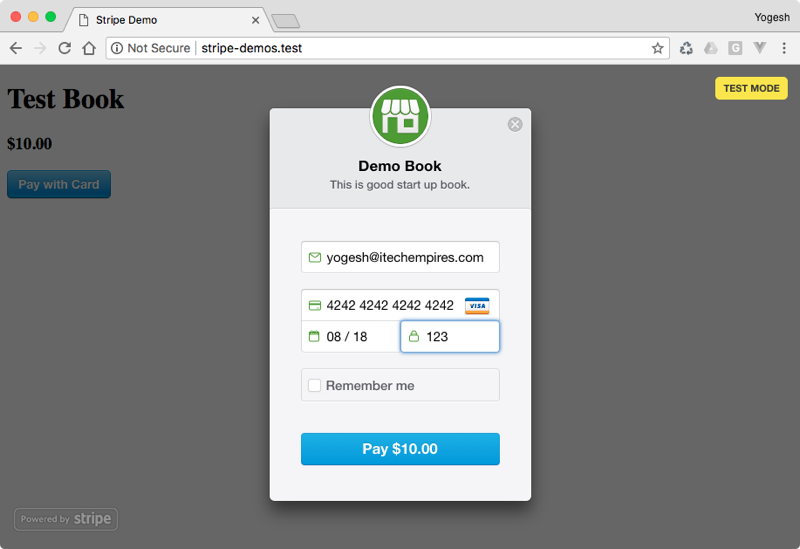
Open application and click pay with card button and feel the given form along with dummy credit card number as showing below:
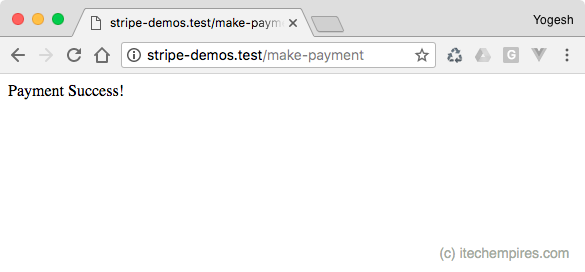
Next hit pay button, you should see success message as showing below:
Now login into the stripe dashboard to test current payment real-time with test data, as you can see below:
We are done in the next part of this tutorial I am going to bring in creating a real customer along with simple shopping cart and also will have ability to save customer for future faster payments.
If you find this tutorial useful, don’t forget to share and comment if you have any question or additional feature request.
Read recommendation – PayPal JavaScript Express checkout Integration in PHP MySQL


Can revise to and stripe.js/v3 and elements with ngrok on docker microservices environment to speed up dev and deployment!
It’s not working it gives this error As per Indian regulations, export transactions require a customer name and address. More info here: https://stripe.com/docs/india-exports