
As a developer we always needs to deal with e-commerce applications where payments transactions comes into place and then we need to build a system where user/customer should able to pay online from your application to purchase something, to do so I am going to provide very simple and secure way to implement this kind of functionality to your application.
Now a days there is lot of payment option available but from all them PayPal provides very good interface and opportunity to implement Payment features and important point is it’s secure you can implement PayPal in any website or application it just works out of the box and it’s popular globally.
PayPal becomes convenient way to you and your customer, PayPal makes simple and easier way to get paid and increase your sales.
Table of Contents
Tutorial Features:
- Login screen for the demo (we will have a predefined user ready to login and test the demo)
- Product Listing with Add to Shopping Cart Button
- Add Product to Shopping Cart
- Remove Product From Shopping Cart
- Shopping Cart page with good design
- PayPal Express Checkout Button (this button will help us to get paid)
- My Orders Page with order listing details such as Order Total and Ordered items.
- Logout the user from the demo
You can checkout the live demo and Tutorial Overview Video:
Live DemoTutorial Overview Video:
Let’s dive into it:
Step 1: Database Design
We are going to need users, product details, order details and order items table for this application, so go ahead and create MySQL tables as showing below:
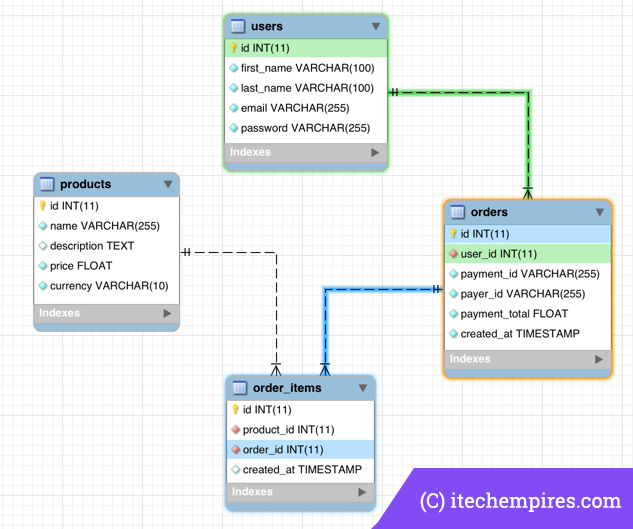
Users:
CREATE TABLE `users` (
  `id` int(11) unsigned NOT NULL AUTO_INCREMENT,
  `first_name` varchar(100) NOT NULL DEFAULT '',
  `last_name` varchar(100) NOT NULL DEFAULT '',
  `email` varchar(255) NOT NULL DEFAULT '',
  `password` varchar(255) NOT NULL DEFAULT '',
  PRIMARY KEY (`id`)
) ENGINE=InnoDB AUTO_INCREMENT=2 DEFAULT CHARSET=latin1;
Products:
CREATE TABLE `products` (
  `id` int(11) unsigned NOT NULL AUTO_INCREMENT,
  `name` varchar(255) NOT NULL DEFAULT '',
  `description` text,
  `price` float NOT NULL,
  `currency` varchar(10) NOT NULL DEFAULT '',
  PRIMARY KEY (`id`)
) ENGINE=InnoDB AUTO_INCREMENT=5 DEFAULT CHARSET=latin1;
Orders:
CREATE TABLE `orders` (
  `id` int(11) unsigned NOT NULL AUTO_INCREMENT,
  `user_id` int(11) unsigned NOT NULL,
  `payment_id` varchar(255) NOT NULL DEFAULT '',
  `payer_id` varchar(255) NOT NULL DEFAULT '',
  `payment_total` float NOT NULL,
  `created_at` timestamp NOT NULL DEFAULT CURRENT_TIMESTAMP ON UPDATE CURRENT_TIMESTAMP,
  PRIMARY KEY (`id`),
  KEY `order_belongs_to_user` (`user_id`),
  CONSTRAINT `order_belongs_to_user` FOREIGN KEY (`user_id`) REFERENCES `users` (`id`) ON DELETE CASCADE ON UPDATE NO ACTION
) ENGINE=InnoDB AUTO_INCREMENT=5 DEFAULT CHARSET=latin1;
Order Items:
CREATE TABLE `order_items` (
  `id` int(11) unsigned NOT NULL AUTO_INCREMENT,
  `product_id` int(11) unsigned NOT NULL,
  `order_id` int(11) unsigned NOT NULL,
  `created_at` timestamp NULL DEFAULT CURRENT_TIMESTAMP,
  PRIMARY KEY (`id`),
  KEY `item_belongs_to_order` (`order_id`),
  KEY `item_belongs_product` (`product_id`),
  CONSTRAINT `item_belongs_product` FOREIGN KEY (`product_id`) REFERENCES `products` (`id`) ON DELETE NO ACTION ON UPDATE NO ACTION,
  CONSTRAINT `item_belongs_to_order` FOREIGN KEY (`order_id`) REFERENCES `orders` (`id`) ON DELETE CASCADE ON UPDATE NO ACTION
) ENGINE=InnoDB AUTO_INCREMENT=4 DEFAULT CHARSET=latin1;
Insert Dummy Products:
Insert few dummy products into the products tables, you can use following sql script to insert required dummy products for this demo.
INSERT INTO `products` (`id`, `name`, `description`, `price`, `currency`)
VALUES
	(1,'Product 1','Lorem ipsum dolor sit amet, consectetur adipisicing elit. A eos fuga illo magni, odio rerum sunt! Asperiores deleniti iste magni modi necessitatibus quae quis! Facere magnam numquam quisquam repellendus tempore!\n',2,'USD'),
	(2,'Product 2','Lorem ipsum dolor sit amet, consectetur adipisicing elit. A eos fuga illo magni, odio rerum sunt! Asperiores deleniti iste magni modi necessitatibus quae quis! Facere magnam numquam quisquam repellendus tempore!',1.99,'USD'),
	(3,'Product 3','Lorem ipsum dolor sit amet, consectetur adipisicing elit. A eos fuga illo magni, odio rerum sunt! Asperiores deleniti iste magni modi necessitatibus quae quis! Facere magnam numquam quisquam repellendus tempore!',5,'USD'),
	(4,'Product 4','Lorem ipsum dolor sit amet, consectetur adipisicing elit. A eos fuga illo magni, odio rerum sunt! Asperiores deleniti iste magni modi necessitatibus quae quis! Facere magnam numquam quisquam repellendus tempore!',1,'USD');
Step 2: Setup Sandbox Account
You are going to need PayPal sandbox account to proceed, visit https://developer.paypal.com/ and sign-up for new developer account.
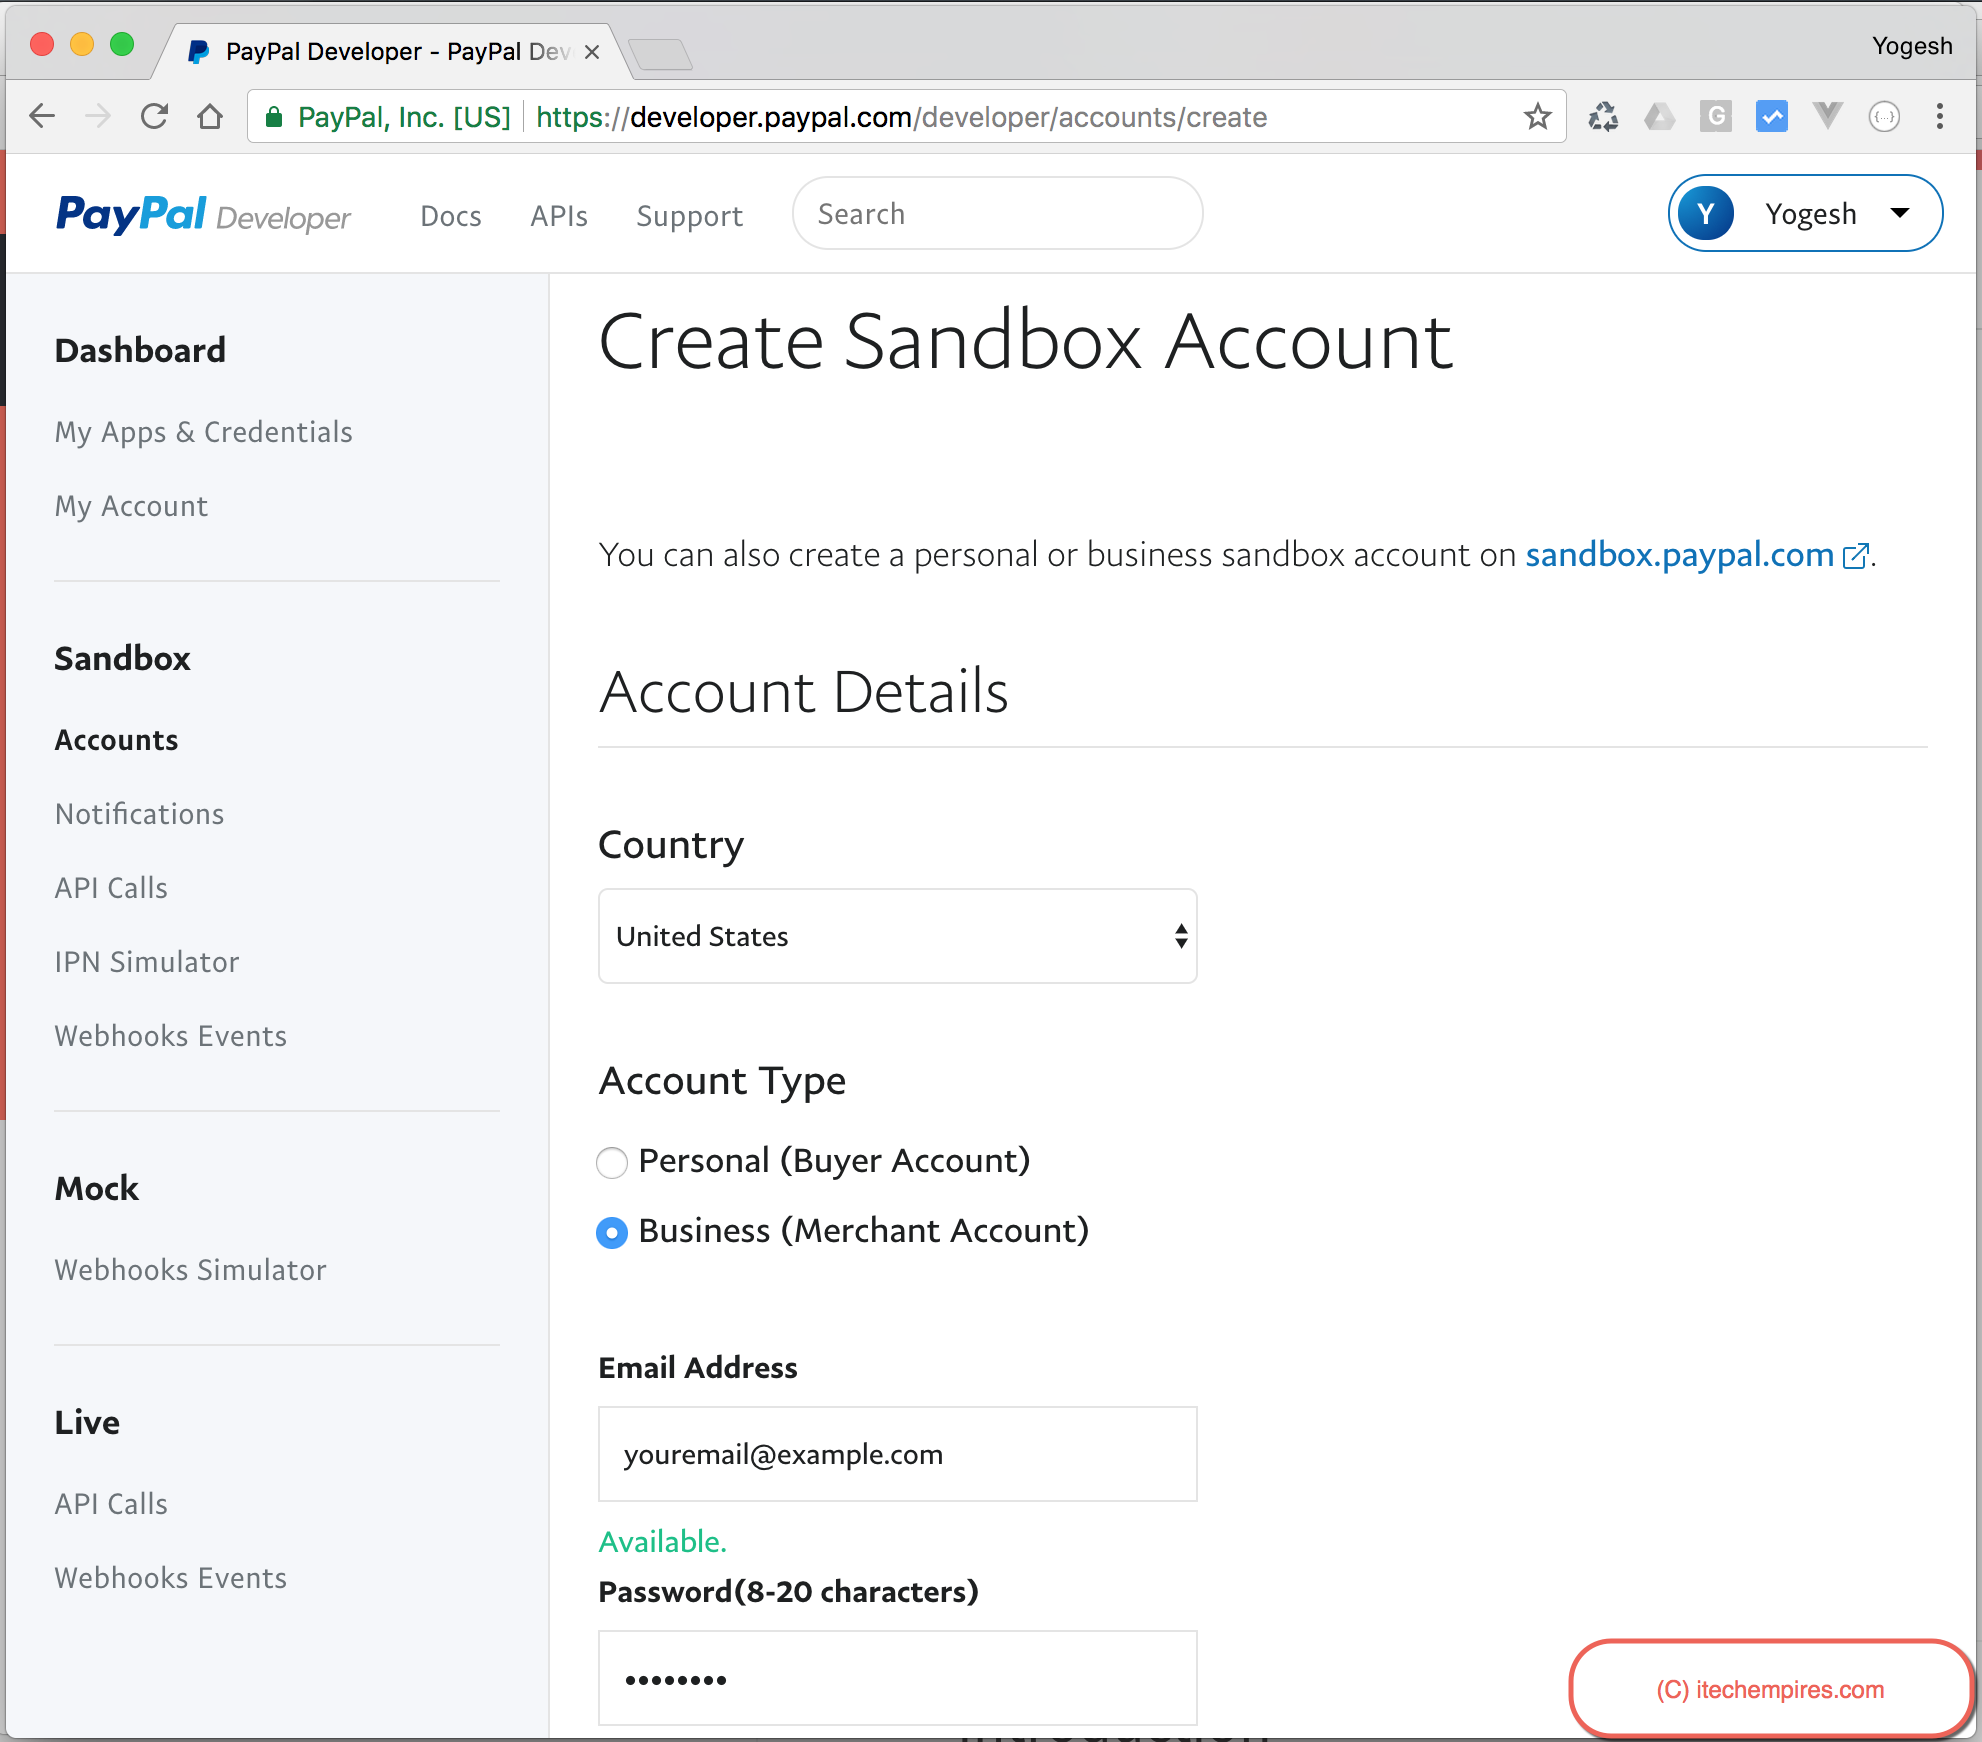
After getting account created login to your PayPal development account and from the left menu visit Sandbox Account section, where you will see create account button, click create account to get following screen and then enter required details, such as email address and password for you sandbox account as showing below:
Don’t forgot to select Business (Merchant account), as you will be a Merchant at PayPal to accept payments.
Account Details:
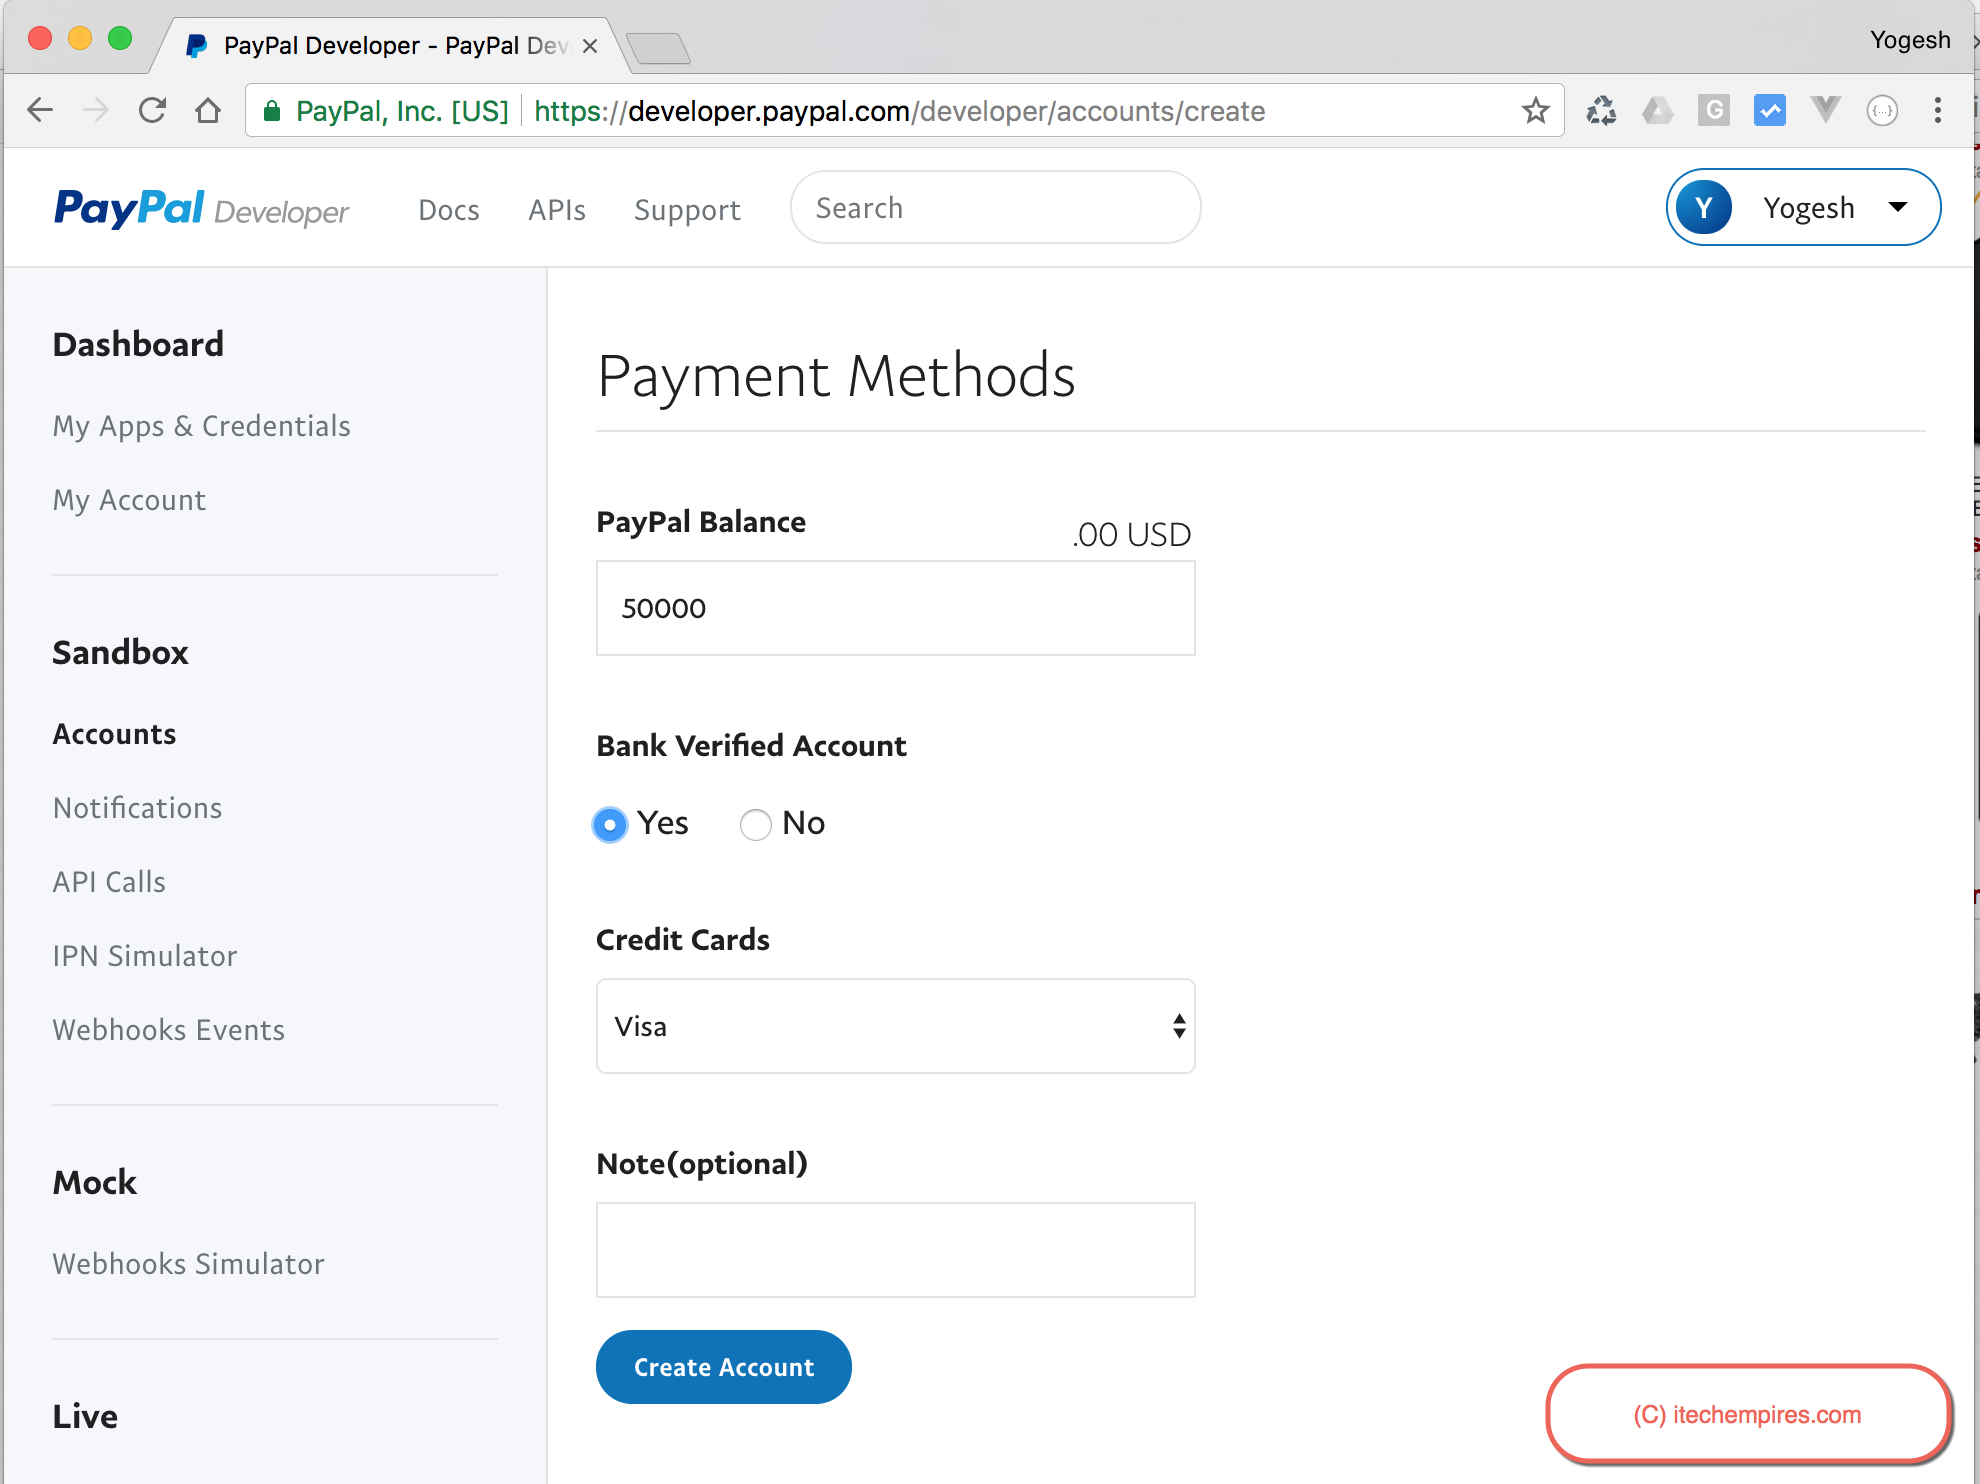
Next enter payment methods details, such as PayPal sandbox account balance, select back verified account to yes and select credit card type and finally click Create Account button
Payment Methods:
Step 3: Create PayPal REST API Application
Visit My Apps & Credentials section from left menu of PayPal developer account and scroll down to see REST API apps section, click Create App button to proceed creating new REST API Application.
By creating REST API application you will have client id and client secrete for the development environment to access PayPal API restfully from the backend, later on you can make this application as a live application if you are done with your required development and testing, after making it live you would be able to accept real payment from real users, but before doing this you need have active verified PayPal account and make sure your sandbox user is active PayPal user which is having bank account setup and verified.
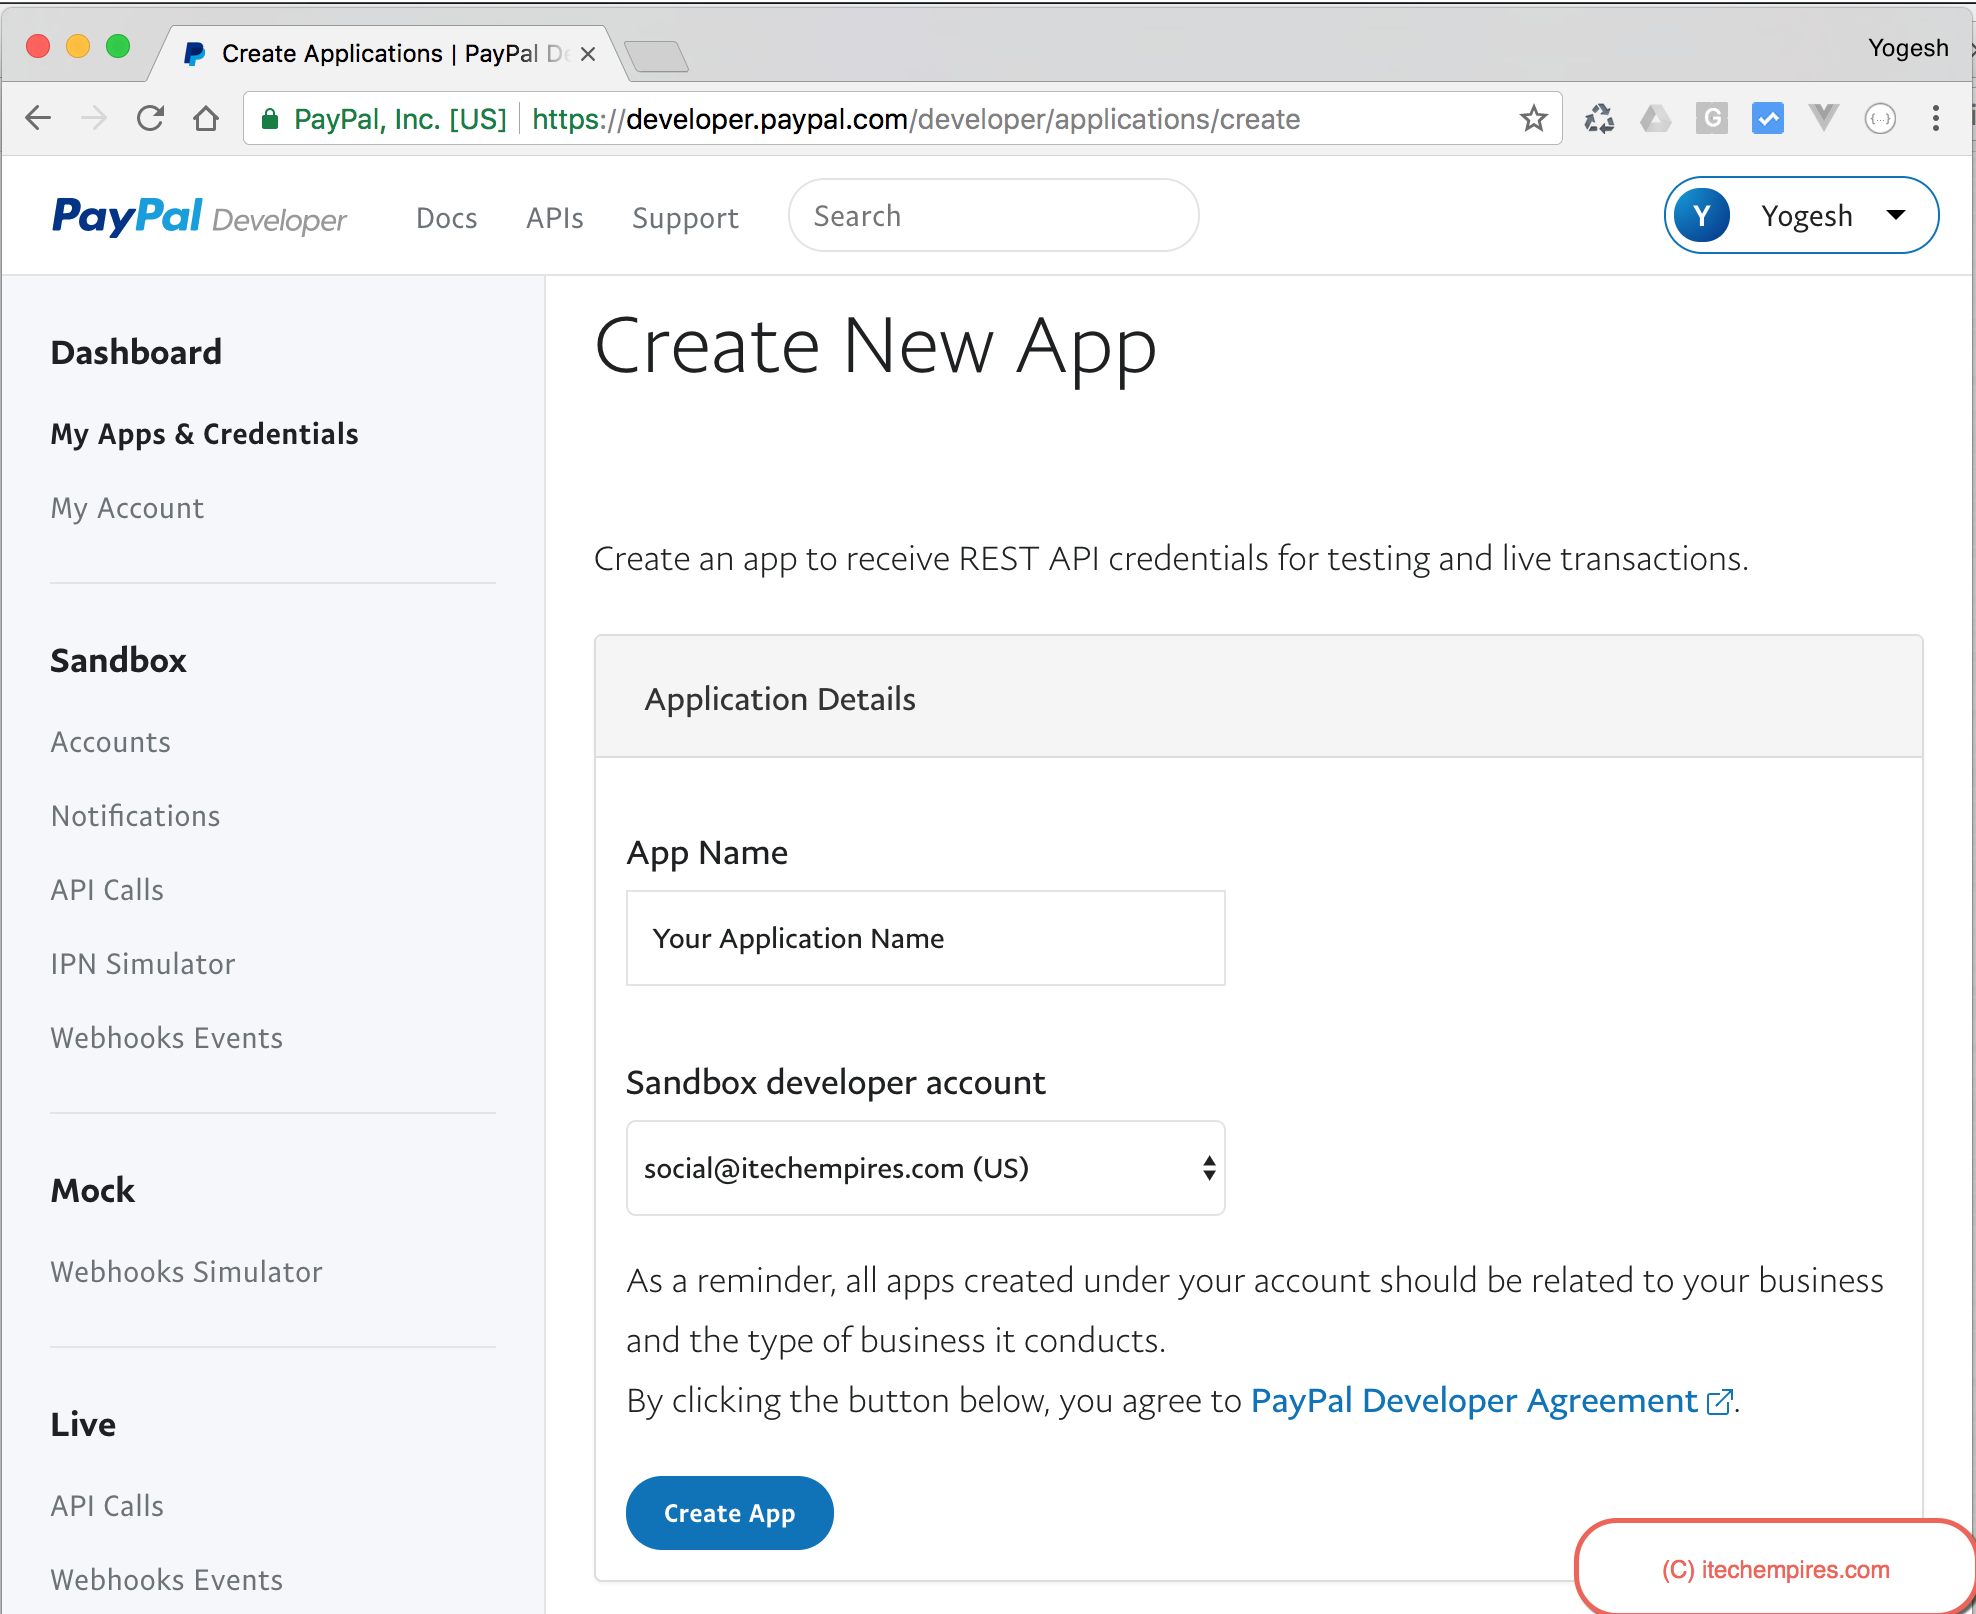
So move on to the next step you will have following scree to create new REST API, fill in the required field such as Application name and select a sandbox user as showing below:
Create New App:
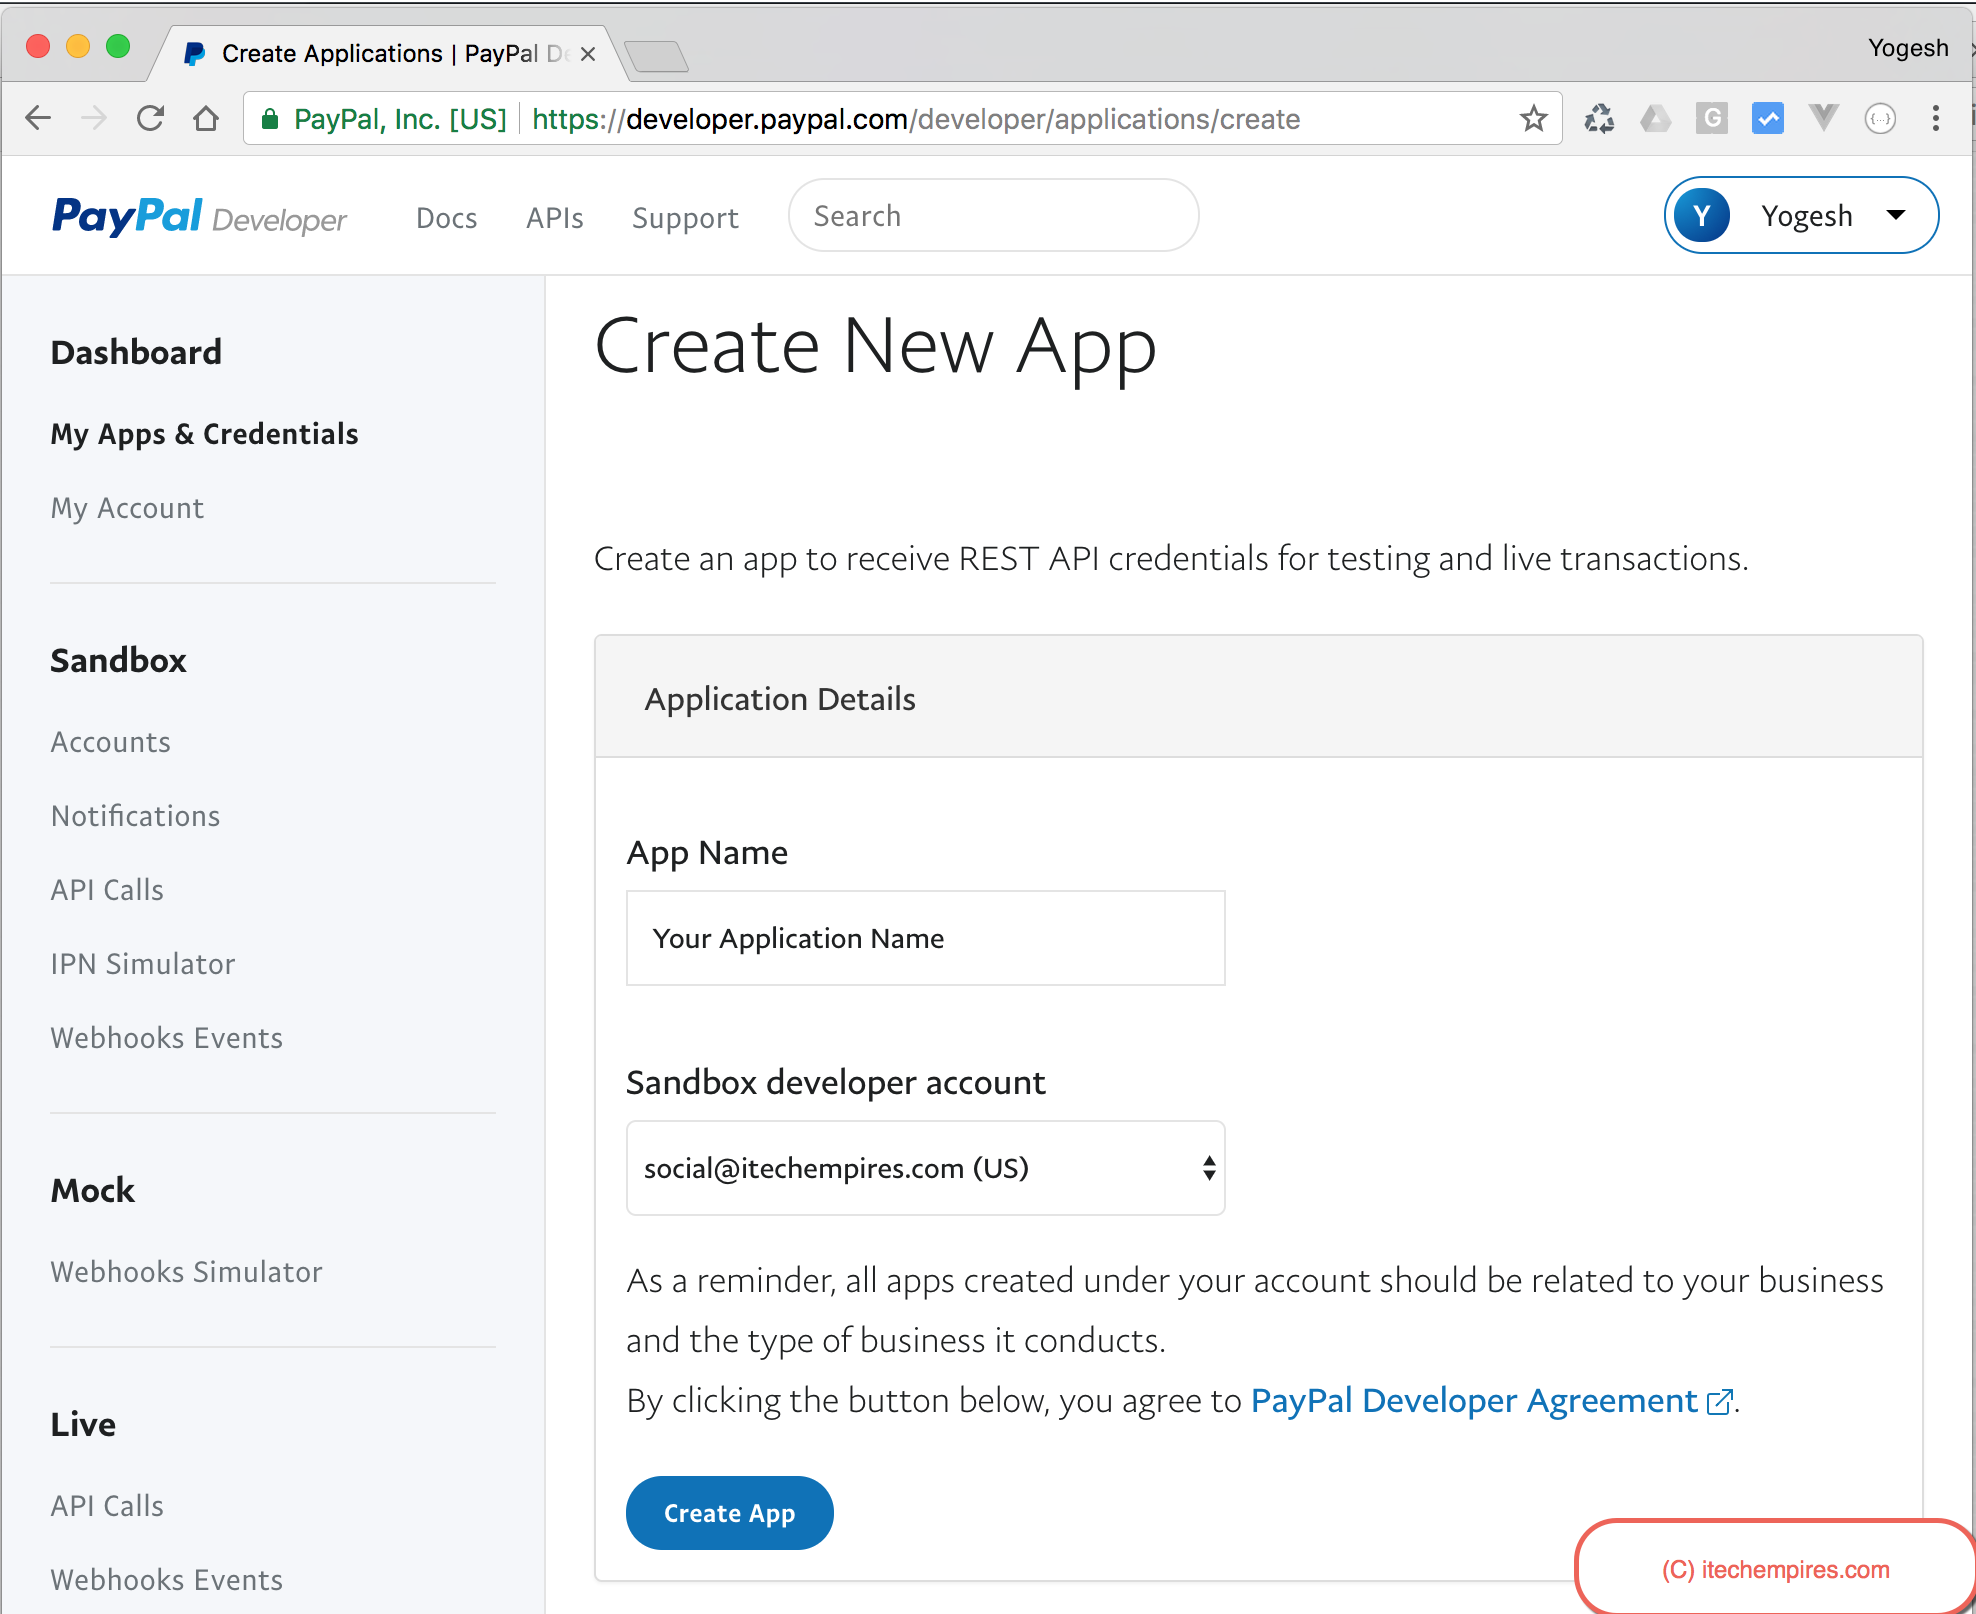
Click Create App button to create new Application, now you should get following screen which gives you recently created application details such as an account name, Client ID and Secrete code:
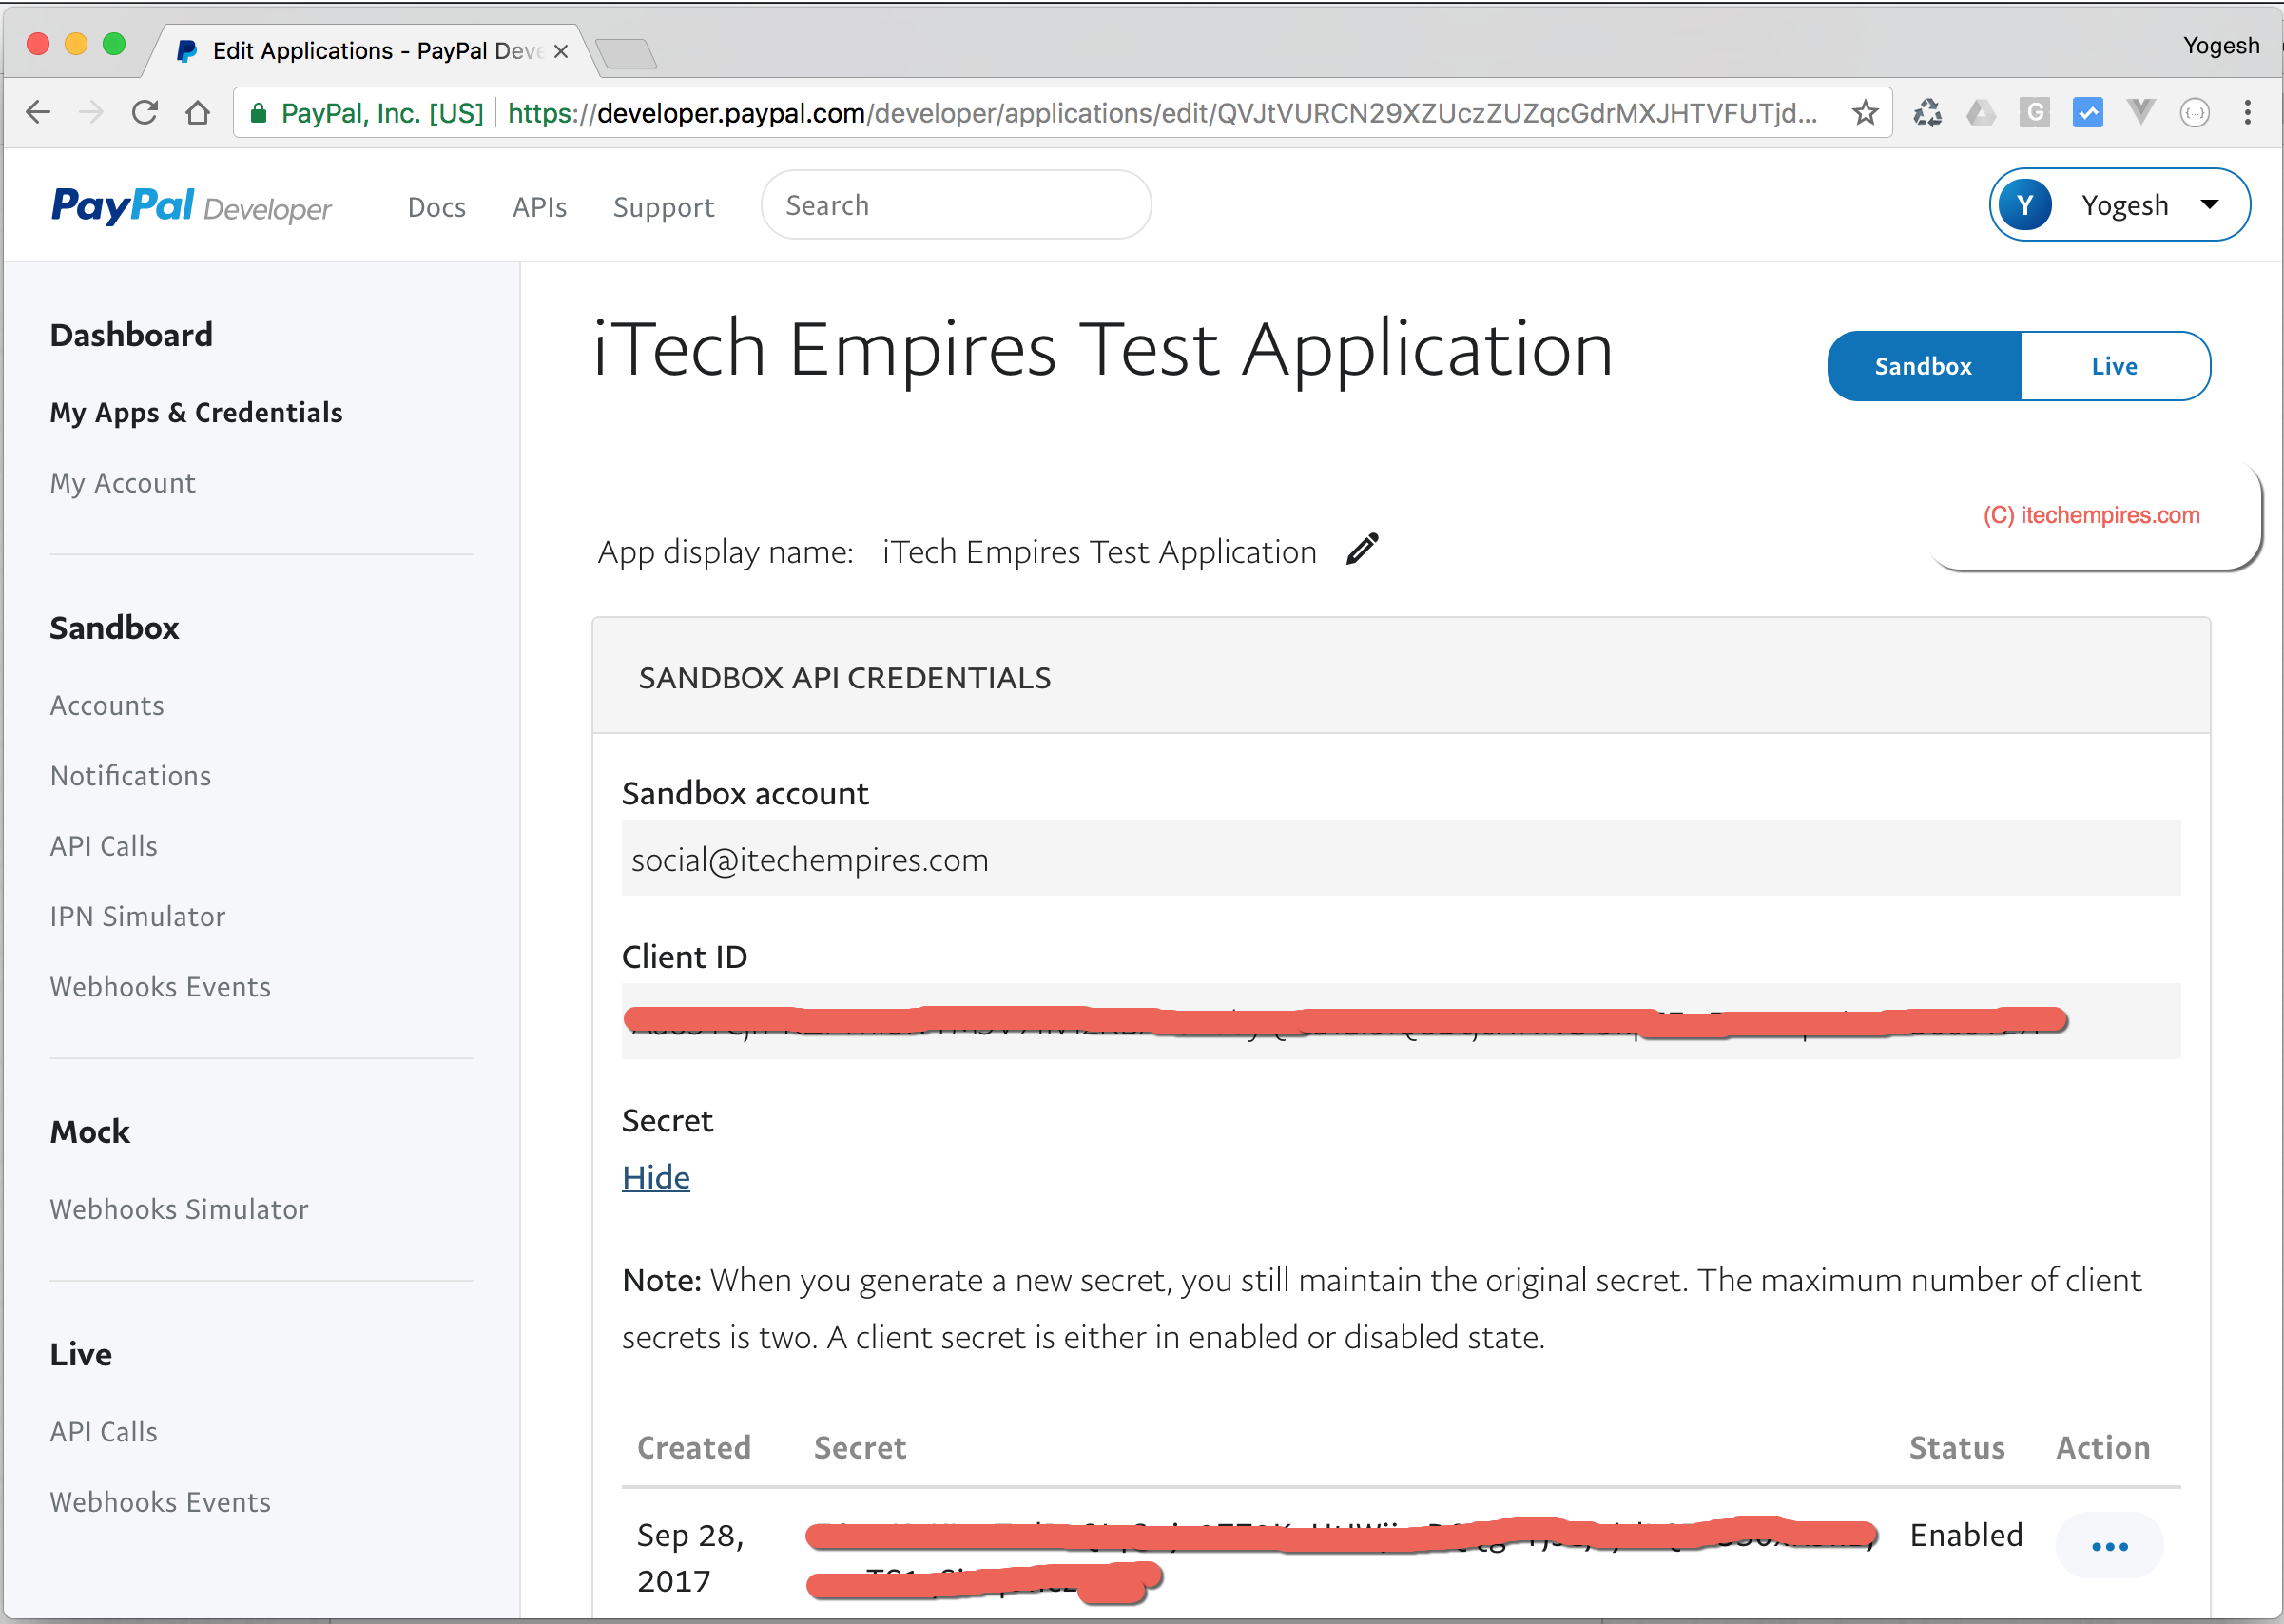
So far we have done with the basic required settings and Database Setup now it’s time to start creating new PHP Application.
Click below link to follow Next steps of this tutorial:
PayPal Express checkout in PHP MySQL – Part 2

HI SIR, I ‘m very interested with your demo.
please, could you send me all source code, I’d like to integrated this in my web site.
my mail adress is : breddayves@gmail.com
Thanks Yogesh for your job, excelent! Works fine! This one was the best that I found in the web.