TailWind CSS is utility-first based css framework and it is best framework for full stack developers because of its ease of use and customer satisfaction.
In this tutorial I am going to guid you on how you can install tailwind framework inside your laravel project.
Installing tailWind framework is not simple as installing bootstrap framework, it requires little bit of configuration long with laravel Mix.
We can Install TailWindCSS on any of laravel framework old or new
Table of Contents
Steps to install TailWindCSS
- Install TailWind using Npm
- Import TailWind CSS to Laravel CSS
- Generate TailWind Config File
- Add TailWind into Laravel Mix Build Process
- Build Laravel Mix
- Examples of Using TailWind CSS
1. Install TailWind using npm
I assume that you already have created a Laravel application if not you cal create with laravel install or composer.
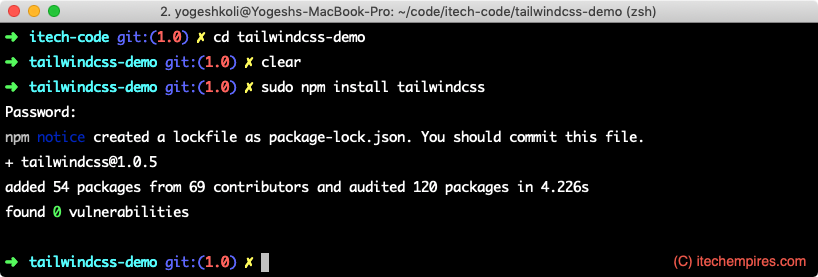
okay so now open you terminal and navigate into your application root directory and execute following command, if you are windows use then open command prompt:
npm install tailwindcss
2. Import TailWind CSS to Laravel CSS
Now the tailwindcss has been added to our node_modules and we are ready to use it in our project. if you looked the app.scss file from resource folder you will see that laravel already comes with Bootstrap front end framework configured.
We can replace bootstrap with tailwind.
Go ahead and remove following lines from /resources/sass/app.scss file
/// Fonts/
/@import/ url('https://fonts.googleapis.com/css?family=Nunito');

/// Variables/
/@import/ 'variables';

/// Bootstrap/
/@import/ '~bootstrap/scss/bootstrap';
And Replace with following tailwind imports:
@tailwind base;

@tailwind components;

@tailwind utilities;
The above tailwind directive will inject TailWind base, components and utilities styles into our app.scss
3. Generate TailWind Config File
Now the next step is to generate tailwind config file into root of our Laravel application.
This file is going to be used by laravel mix when we will build scss into css.
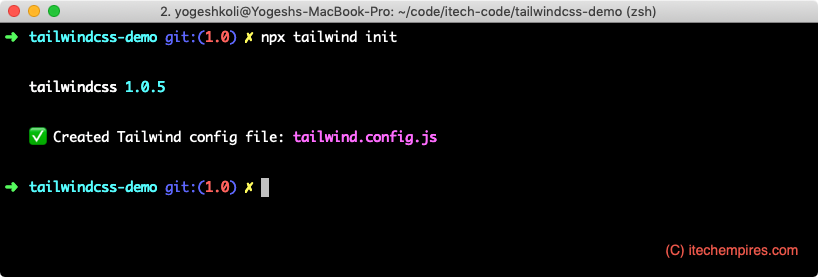
Execute following command to generate tailwind config file:
npx tailwind init
After running above running above command if you check into root of your project you will see new file created called tailwind.config.js if you open into your code editor it should have following JS configuration written:
module.exports = {
  theme: {
    extend: {}
  },
  variants: {},
  plugins: []
}
4. Add TailWind into Laravel Mix Build Process
Now will have to add tailwind into Laravel mix build process basically will have to tell laravel mix to compile tailwind sass using the tailwind configuration file.
Laravel mix configuration can be located at webpack.mix.js, so go ahead and open webpack.mix.js file:
You should see following default configuration:
const mix = require('laravel-mix');

mix.js('resources/js/app.js', 'public/js')
    .sass('resources/sass/app.scss', 'public/css');
Replace it with following configuration:
const mix = require('laravel-mix');
const tailwindcss = require('tailwindcss');

mix.js('resources/js/app.js', 'public/js')
    .sass('resources/sass/app.scss', 'public/css')
    .options({
        processCssUrls: false,
        postCss: [tailwindcss('./tailwind.config.js')],
    });
5. Build Laravel Mix
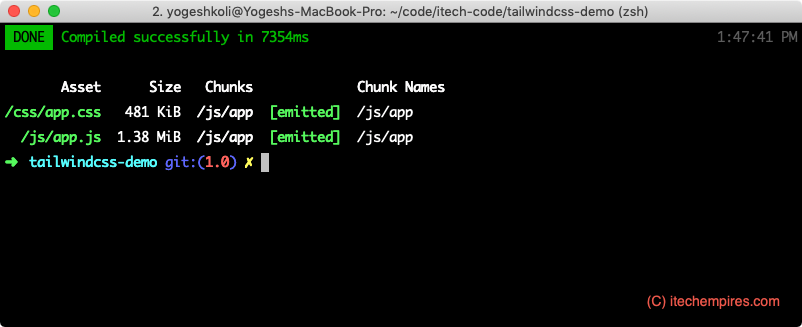
Now that we have are ready to build and compile our application assets go ahead and run following command from your terminal or command prompt:
npm install
npm run dev
You should see following success screen after compiling all assets:

6. Examples of Using TailWind CSS
Now we can use tailwind utility class into our project ok to do so I am going to demonstrate example uses of tailwind css on welcome.blade.php
First Let’s import app.css file into welcome.blade.php file:
<link href="{{ asset('css/app.css') }}" rel="stylesheet">Here is the code for login form which I have copied from tailwind components section.
Add this into body of welcome.blade.php page:
<div class="w-full max-w-xs">
            <form class="bg-white shadow-md rounded px-8 pt-6 pb-8 mb-4">
                <div class="mb-4">
                <label class="block text-gray-700 text-sm font-bold mb-2" /for/="username">
                    Username
                </label>
                <input class="shadow appearance-none border rounded w-full py-2 px-3 text-gray-700 leading-tight focus:outline-none focus:shadow-outline" id="username" type="text" placeholder="Username">
                </div>
                <div class="mb-6">
                <label class="block text-gray-700 text-sm font-bold mb-2" /for/="password">
                    Password
                </label>
                <input class="shadow appearance-none border border-red-500 rounded w-full py-2 px-3 text-gray-700 mb-3 leading-tight focus:outline-none focus:shadow-outline" id="password" type="password" placeholder="******************">
                <p class="text-red-500 text-xs italic">Please choose a password.</p>
                </div>
                <div class="flex items-center justify-between">
                <button class="bg-blue-500 hover:bg-blue-700 text-white font-bold py-2 px-4 rounded focus:outline-none focus:shadow-outline" type="button">
                    Sign In
                </button>
                <a class="inline-block align-baseline font-bold text-sm text-blue-500 hover:text-blue-800" href="#">
                    Forgot Password?
                </a>
                </div>
            </form>
            <p class="text-center text-gray-500 text-xs">
                ©2019 iTech Empires. All rights reserved.
            </p>
            </div>
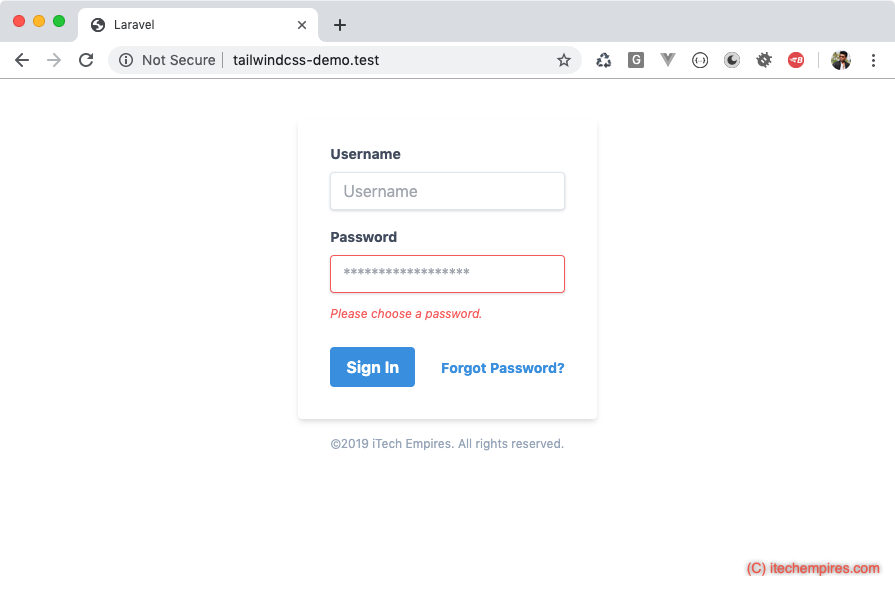
Here is how you will get the design output on webpage:

If you get any question on tutorial feel free to comment using comment section below. I hope this tutorial helped you on installing tailwind.
Git Repository of Laravel Application with Tailwind Installed: https://github.com/yogeshkoli/laraveltailwindcss

Thank you for the amazing instructions!!! And for taking your time to write this article for us.
How do you format it in this style?
{!! Form::open([‘action’ => ‘PostsController@store’, ‘method’ => ‘POST’]) !!}
{{ Form::label(‘author’, ‘Author’) }}
{{ Form::text(‘author’, ”, [‘placeholder’ => ‘Author’]) }}
{{ Form::label(‘title’, ‘Title’) }}
{{ Form::text(‘title’, ”, [‘placeholder’ => ‘Title’]) }}
{{ Form::label(‘headline’, ‘Headline’) }}
{{ Form::text(‘headline’, ”, [‘placeholder’ => ‘Headline’]) }}
{{ Form::label(‘body’, ‘Body’) }}
{{ Form::text(‘body’, ”, [‘placeholder’ => ‘Body Text’]) }}
{{ Form::label(‘tags’, ‘Tags’) }}
{{ Form::text(‘tags’, ”, [‘placeholder’ => ‘Tags’]) }}
{{ Form::submit(‘Submit’), [] }}
{!! Form::close() !!}
Thank you so much
Thanks a lot…