


Table of Contents
User Account activation, email verification using PHP, MySQL and Swift Mailer
Introduction:
I have posted tutorials on login registration system, which has simple account registration process to just enter the details to create new account and you can login to the account, but we always need to verify account email under live application to make sure user is using live email account for further use.
I am writing this tutorial for those users who want to implement email activation feature into the PHP application.
Please make sure we will be using Swiftmailer to send emails, if you are not familiar with swiftmailer you can read the following tutorial to read about sending emails using swiftmailer : PHP Email Sending with SwiftMailer
This tutorial is having following features:
- Register New User
- Send account activation email with verification link
- Verify user with verification link
- User login
Technology used:
- PHP
- MySQL
- Bootstrap 3.3.7
- Swift Mailer
Let’s get started:
Step 1: Application Directory and Database setup
First step is to setup application directly under web application directory, it can be anything it is totally dependent on your Operating System and work environment setup.
I am going to assume that you have created an empty directory to use for our login registration application.
Second step is to create new MySQL database with users table to use a backend for this application, if you already having a database setup then you can skip this step.
Use following command to create your database:
create database `itechempires_dev`;
You can replace the database name with whatever you suggest just make sure to keep this in mind to replace while connecting from PHP script, now let’s create users tables with required fields.
Use following SQL query to create new table called `users`:
CREATE TABLE `users` (
  `id` int(11) NOT NULL AUTO_INCREMENT,
  `first_name` varchar(30) NOT NULL,
  `last_name` varchar(30) NOT NULL,
  `email` varchar(100) NOT NULL,
  `password` varchar(250) NOT NULL,
  `status` int(11) NOT NULL DEFAULT '0',
  `email_activation_key` varchar(100) NOT NULL,
  PRIMARY KEY (`id`),
  UNIQUE KEY `email` (`email`)
) ENGINE=InnoDB DEFAULT CHARSET=latin1;

A quick overview on important fields of the table:
- `id` : Primary key with auto increment
- `status`: not null default is set to `0`, zero means a user is inactive
- ` email_activation_key `: this field is going to have temporary activation code will be using it while doing verification process.
Step 2: Design Registration and Login Forms:
Before going to start designing we will need to download bootstrap framework from `getbootstrap.com`, please visit the site and download required version of bootstrap framework. It is good practice to use design frameworks while developing the web application it helps to boost our development process bootstrap is one of the best examples.
If you’re done with the download extract the file and copy and paste ` bootstrap-3.3.7-dist ` folder to your application directory.
Create new `index.php` page and use following script:
<!doctype html>
<html lang="en">
<head>
    <meta charset="UTF-8">
    <title>Home</title>
    <link rel="stylesheet" href="bootstrap-3.3.7-dist/css/bootstrap.min.css">
</head>
<body>

<div class="container">
    <div class="row">
        <div class="col-md-12">
            <h2>
                Account activation process with email verification using PHP, MySQL and Swiftmailer
            </h2>
        </div>
    </div>
    <div class="row">
        <div class="col-md-5 well">
            <h4>Register</h4>

            <form action="index.php" method="post">
                <div class="form-group">
                    <label for="">First Name</label>
                    <input type="text" name="first_name" class="form-control" placeholder="First Name"/>
                </div>
                <div class="form-group">
                    <label for="last_name">Last Name</label>
                    <input type="text" id="last_name" name="last_name" class="form-control" placeholder="Last Name"/>
                </div>
                <div class="form-group">
                    <label for="email">Email</label>
                    <input type="text" id="email" name="email" class="form-control" placeholder="Email Address"/>
                </div>
                <div class="form-group">
                    <label for="password">Password</label>
                    <input type="password" id="password" name="password" class="form-control" placeholder="Password"/>
                </div>
                <div class="form-group">
                    <input type="submit" name="btnRegister" class="btn btn-primary" value="Register"/>
                </div>
            </form>
        </div>
        <div class="col-md-2"></div>
        <div class="col-md-5 well">
            <h4>Login</h4>

            <form action="index.php" method="post">
                <div class="form-group">
                    <label for="email">Email</label>
                    <input type="email" id="email" name="email" class="form-control" placeholder="Email Address"/>
                </div>
                <div class="form-group">
                    <label for="">Password</label>
                    <input type="password" id="password" name="password" class="form-control" placeholder="Password"/>
                </div>
                <div class="form-group">
                    <input type="submit" name="btnLogin" class="btn btn-primary" value="Login"/>
                </div>
            </form>
        </div>
    </div>
</div>

</body>
</html>
If you try to run this script on web browser you will see I have added two forms on single page as you know this a just demo to learn you can have two separate pages for each request, just make sure about the form action.
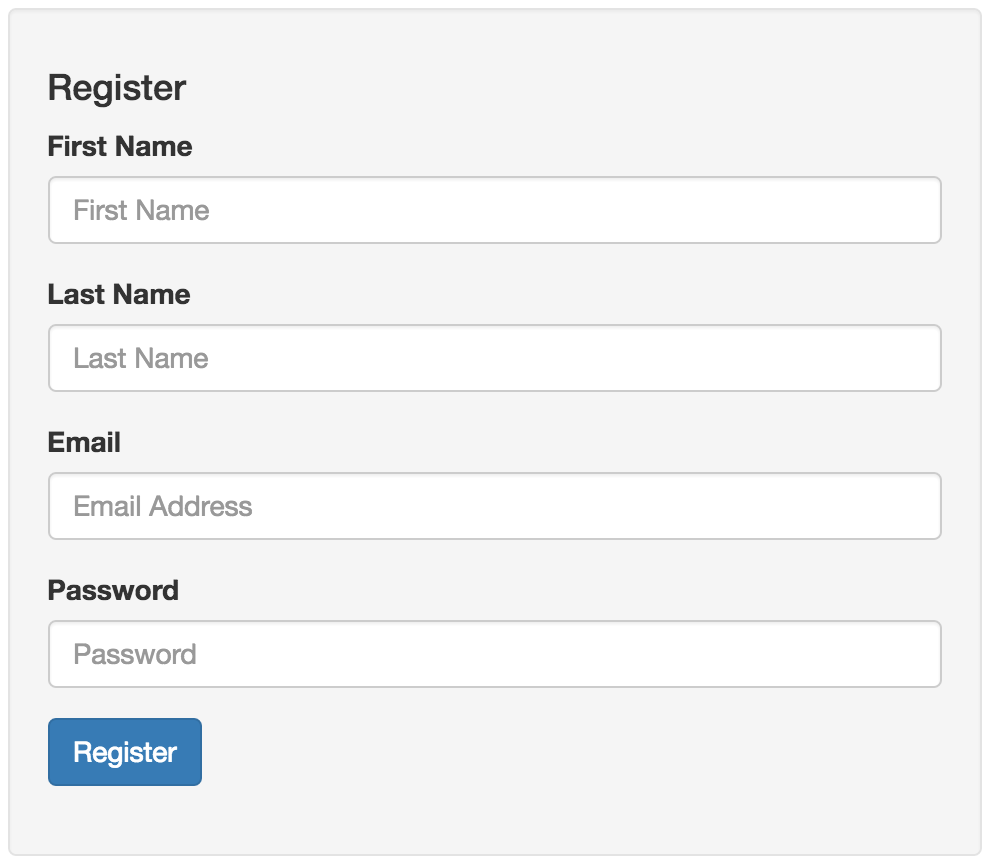
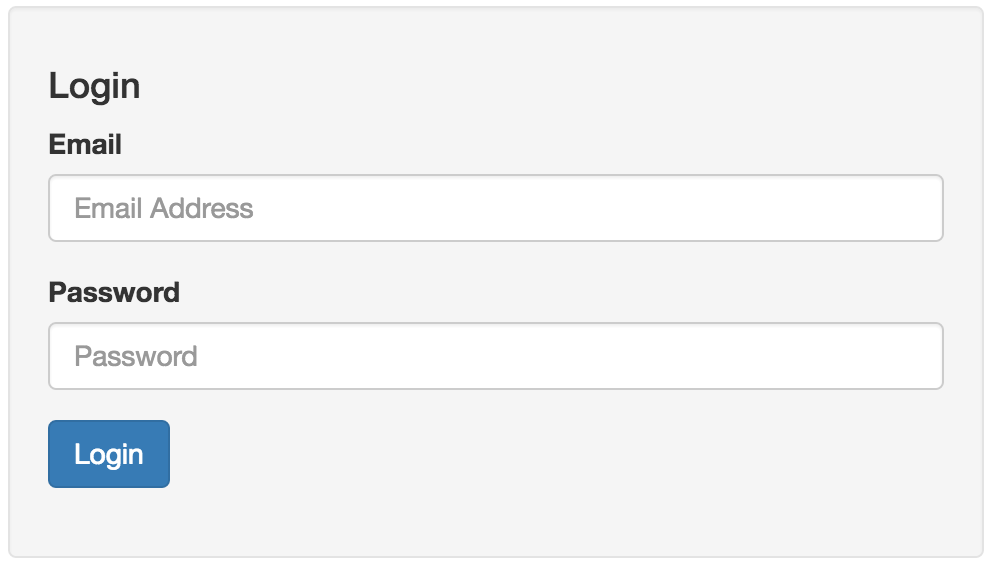
Let’s have a quick look on our forms:
`Register`:
`Login`:
Step 3: Create Database connection script:
This is very basic step but required, we need to create new file and add database connection script to be able to connect to the database whenever required.
Create new file called ` script/database_connection.php` and add following script, please make sure to update required variable to match with your system configuration:
/**
 * Tutorial: PHP Account Activation/verification
 *
 * File: Database Configuration
 */

// database Connection variables
define('HOST', 'localhost'); // Database host name ex. localhost
define('USER', 'root'); // Database user. ex. root ( if your on local server)
define('PASSWORD', 'secret'); // Database user password  (if password is not set for user then keep it empty )
define('DATABASE', 'ADD_DATABASE_NAME_HERE'); // Database name

function DB()
{
    $con = new mysqli(HOST, USER, PASSWORD, DATABASE);

    if ($con->connect_error) {
        die("Connection failed: " . $con->connect_error);
    }

    return $con;
}
Step 4: Install swiftmailer:
As I said we would be using swiftmailer for outgoing emails, so in this step we will install swiftmailer to the application
There are few different ways to install swiftmailer to the application here I will be using composer to get that pulled in, if you don’t have composer installed, I would suggest installing composer or clone swiftmailer from GitHub repository. If you still don’t want to do both of the above steps you can simply download it from the GitHub, anyways let’s install it by using composer
Open Terminal/command line and use following command to install swiftmailer library:
composer require swiftmailer/swiftmailer @stable
If you are getting output similar to below lines, meaning composer is downloading required package files.
./composer.json has been created
Loading composer repositories with package information
Updating dependencies (including require-dev)
  - Installing swiftmailer/swiftmailer (v5.4.3)
    Loading from cache

Writing lock file
Generating autoload files
We have swiftmailer ready to use, move on to the next step to create library file.
Step 5: Create Library with necessary Functions:
We have our basic forms, database connection script and swiftmailer ready to use, now we will be using a central library file with class and functions to use while creating user, login user and send activation email.
Go ahead and create file in the application called `lib/library.php`, make sure to add this under lib folder just to keep this practice in hand to have better management of our source, all right so we have library.php file ready to use:
Add a following script to it, which is have functions to Register new User, Login active user, Send activation email and so on.
/*
 * Tutorial: PHP Account Activation/verification
 *
 * Page: Application library
 * */

class DemoClass
{
    protected $db;

    function __construct()
    {
        $this->db = DB();
    }

    /**
     * register new user
     *
     * @param $first_name
     * @param $last_name
     * @param $email
     * @param $password
     *
     * @return bool
     */
    public function Register($first_name, $last_name, $email, $password)
    {
        $first_name = mysqli_real_escape_string($this->db, $first_name);
        $last_name = mysqli_real_escape_string($this->db, $last_name);
        $email = mysqli_real_escape_string($this->db, $email);
        $password = mysqli_real_escape_string($this->db, $password);
        $password = password_hash($password, PASSWORD_DEFAULT, ['cost' => 11]);
        $email_activation_key = md5($email . $first_name . $last_name);

        $query = "INSERT INTO `users`(first_name, last_name, email, password, email_activation_key)
                  VALUES ('$first_name', '$last_name', '$email', '$password', '$email_activation_key')";
        if (!$result = mysqli_query($this->db, $query)) {
            exit(mysqli_error($this->db));
        }

        // send email
        $this->sendEmail('Verify Your Email Address', $email, $first_name, $email_activation_key);

        return TRUE;
    }

    /**
     * send activation email with swiftmailer
     *
     * @param $subject
     * @param $to
     * @param $name
     * @param $email_activation_key
     */
    public function sendEmail($subject, $to, $name, $email_activation_key)
    {
        $smtp_server = 'smtp.zoho.com';
        $username = 'user@yourdomain.com';
        $password = 'PASSWORD';
        $port = '465';
        $encryption = 'ssl';

        // create account verification link
        $link = 'http://' . $_SERVER['SERVER_NAME'] . '/activation.php?key=' . $email_activation_key;

        // get the html email content
        $html_content = file_get_contents('email/email_verification.html');
        $html_content = preg_replace('/{link}/', $link, $html_content);

        // get plain email content
        $plain_text = file_get_contents('email/email_verification.txt');
        $plain_text = preg_replace('/{link}/', $link, $plain_text);

        $message = Swift_Message::newInstance()
            ->setSubject($subject)
            ->setFrom(['user@yourdomain.com' => 'iTech Empires'])
            ->setTo([$to => $name])
            ->setBody($html_content, 'text/html')// add html content
            ->addPart($plain_text, 'text/plain'); // Add plain text

        $transport = Swift_SmtpTransport::newInstance($smtp_server, $port, $encryption)
            ->setUsername($username)
            ->setPassword($password);

        $mailer = Swift_Mailer::newInstance($transport);

        $mailer->send($message);
    }

    /**
     * check if email already exists
     *
     * @param $email
     *
     * @return bool
     */
    public function isEmail($email)
    {
        $email = mysqli_real_escape_string($this->db, $email);
        $query = "SELECT `email` FROM `users` WHERE `email` = '$email'";
        if (!$result = mysqli_query($this->db, $query)) {
            exit(mysqli_error($this->db));
        }
        if (mysqli_num_rows($result) > 0) {
            return TRUE;
        } else {
            return FALSE;
        }
    }


    /**
     * get user ID by using activation key
     *
     * @param $email_activation_key
     *
     * @return string
     */
    public function getUserID($email_activation_key)
    {
        $email_activation_key = mysqli_real_escape_string($this->db, $email_activation_key);
        $query = "SELECT id FROM `users` WHERE `email_activation_key` = '$email_activation_key'";
        if (!$result = mysqli_query($this->db, $query)) {
            exit(mysqli_error($this->db));
        }
        $data = '';
        if (mysqli_num_rows($result) > 0) {
            while ($row = mysqli_fetch_assoc($result)) {
                $data = $row['id'];
            }
        }

        return $data;
    }

    /**
     * get user ID by using email address
     *
     * @param $email
     *
     * @return string
     */
    public function getUserIDByEmail($email)
    {
        $email = mysqli_real_escape_string($this->db, $email);
        $query = "SELECT id FROM `users` WHERE `email` = '$email'";
        if (!$result = mysqli_query($this->db, $query)) {
            exit(mysqli_error($this->db));
        }
        $data = '';
        if (mysqli_num_rows($result) > 0) {
            while ($row = mysqli_fetch_assoc($result)) {
                $data = $row['id'];
            }
        }

        return $data;
    }

    /**
     * activate account
     *
     * @param $id
     *
     * @return bool
     */
    public function activateAccount($id)
    {
        $query = "UPDATE `users` SET status = 1, email_activation_key = '' WHERE id = '$id'";
        if (!$result = mysqli_query($this->db, $query)) {
            exit(mysqli_error($this->db));
        }

        return TRUE;
    }

    /**
     * check is password is valid
     *
     * @param $email
     * @param $password
     *
     * @return bool
     */
    public function isValidPassword($email, $password)
    {
        $email = mysqli_real_escape_string($this->db, $email);
        $password = mysqli_real_escape_string($this->db, $password);

        if ($this->isEmail($email)) {
            $enc_password = $this->findPasswordByEmail($email);
            if (password_verify($password, $enc_password)) {
                return TRUE;
            } else {
                return FALSE;
            }
        } else {
            return FALSE;
        }

    }

    /**
     * find out password by email
     *
     * @param $email
     *
     * @return string
     */
    function findPasswordByEmail($email)
    {
        $query = "SELECT password FROM `users` WHERE `email`='$email'";
        if (!$result = mysqli_query($this->db, $query)) {
            exit(mysqli_error($this->db));
        }
        $data = '';
        if (mysqli_num_rows($result) > 0) {
            while ($r = mysqli_fetch_assoc($result)) {
                $data = $r['password'];
            }
        }

        return $data;
    }

    /**
     * checkout if account is active
     *
     * @param $email
     *
     * @return bool
     */
    public function isActive($email)
    {
        $email = mysqli_real_escape_string($this->db, $email);
        $query = "SELECT `id` FROM `users` WHERE `email` = '$email' AND status = 1";
        if (!$result = mysqli_query($this->db, $query)) {
            exit(mysqli_error($this->db));
        }
        if (mysqli_num_rows($result) > 0) {
            return TRUE;
        } else {
            return FALSE;
        }
    }

    /**
     * get user details
     *
     * @param $id
     *
     * @return array|null
     */
    public function UserDetails($id)
    {
        $id = mysqli_real_escape_string($this->db, $id);
        $query = "SELECT `first_name`, `last_name`, `email`  FROM `users` WHERE `id` = '$id'";
        if (!$result = mysqli_query($this->db, $query)) {
            exit(mysqli_error($this->db));
        }
        $data = [];
        if (mysqli_num_rows($result) > 0) {
            while ($row = mysqli_fetch_assoc($result)) {
                $data = $row;
            }
        }

        return $data;
    }

}
Detail Description:
If you have a look on above file, we have several functions in the library to perform operations:
`Register()`: used to create a new user, it requires four parameters `first_name`, `last_name`, `email` and `password` after creating new user it is going to call another function to send activation email.
`sendEmail()`: used to send activation email to the user using swiftmailer, please make sure to change required user email and password under SMTP settings.
`isEmail()`: to check whether email is exists in the application, this is going to be useful while creating new user as well as login existing user.
`getUserID()`: use to get user ID from the database by using activation key which we are going to send with the email while creating new user.
`getUserIDByEmail()`: as name suggest, it used to get User ID by using user email address.
`activateAccount()`: used to activate the user by using User ID, we are going to call this function from `activation.php` page.
`isValidPassword()`: validated the given password while login, we are using `password_verify()` function to validate the password which is encrypted by `password_hash()` function.
`findPasswordByEmail()`: finding the encrypted password by email.
`isActive()`: check whether given email address is active or inactive.
`UserDetails()`: used to get user details to display on profile page.
Step 6: Add required HTML email files:
If you check `sendEmail()` function you will see that we need html and plain text content while sending email from swiftmailer, these files are going to have the email content along with the activation link.
Go ahead and create following files and add give source to it:
`email/email_verification.html`
<!DOCTYPE html>
<html lang="en">
<head>
    <meta charset="UTF-8">
    <title></title>
    <style>
        h1, h4 {
            color: #ff4500;
        }

        .header {
            border-bottom: 2px solid #ff4500;
            background-color: #fff;
            text-align: center;
        }

        .footer {
            border-top: 2px solid #1b6d85;
        }

        .footer > a {
            color: #ff4500;
        }

    </style>
</head>
<body>
<table width="100%">
    <tr>
        <td align="center">
            <table width="600">
                <tr>
                    <td class="header">
                        <h1>iTech Empires</h1>
                    </td>
                </tr>
                <tr>
                    <td>
                        <h2>Verify Your Email Address</h2>
                        <p> Thanks for creating an account with the verification demo tutorial.
                            Please follow the link below to verify your email address.</p>
                        <a href="{link}">{link}</a>
                    </td>
                </tr>
                <tr>
                    <td>
                        <br/>
                        Regards,<br/>
                        iTech Empires
                    </td>
                </tr>
                <tr>
                    <td class="footer">
                        © 2016 iTech Empires. All rights reserved.
                    </td>
                </tr>
            </table>
        </td>
    </tr>
</table>
</body>
</html>
`email/email_verification.txt`
iTech Empires

Verify Your Email Address

Thanks for creating an account with the verification demo tutorial. Please follow the link below to verify your email address.

{link}

Regards,
iTech Empires
© 2016 iTech Empires. All rights reserved.
You can change the content as per your requirement.
Step 7: Register User:
Open up the `index.php` file, which is having login and register form, let’s add register feature there.
Add following line of code at the top of the index.php page.
$login_error_message = '';
$register_error_message = '';
$register_success_message = '';
// check Register request
if (!empty($_POST['btnRegister'])) {
// validated user input
if ($_POST['first_name'] == "") {
$register_error_message = 'First name field is required!';
} else if ($_POST['last_name'] == "") {
$register_error_message = 'Last name field is required!';
} else if ($_POST['email'] == "") {
$register_error_message = 'Email field is required!';
} else if ($_POST['password'] == "") {
$register_error_message = 'Password field is required!';
} else if (!filter_var($_POST['email'], FILTER_VALIDATE_EMAIL)) {
$register_error_message = 'Invalid email address!';
} else if ($app->isEmail($_POST['email'])) {
$register_error_message = 'Email is already in use!';
} else {
if ($app->Register($_POST['first_name'], $_POST['last_name'], $_POST['email'], $_POST['password'])) {
// show success message and ask user to check email for verification link
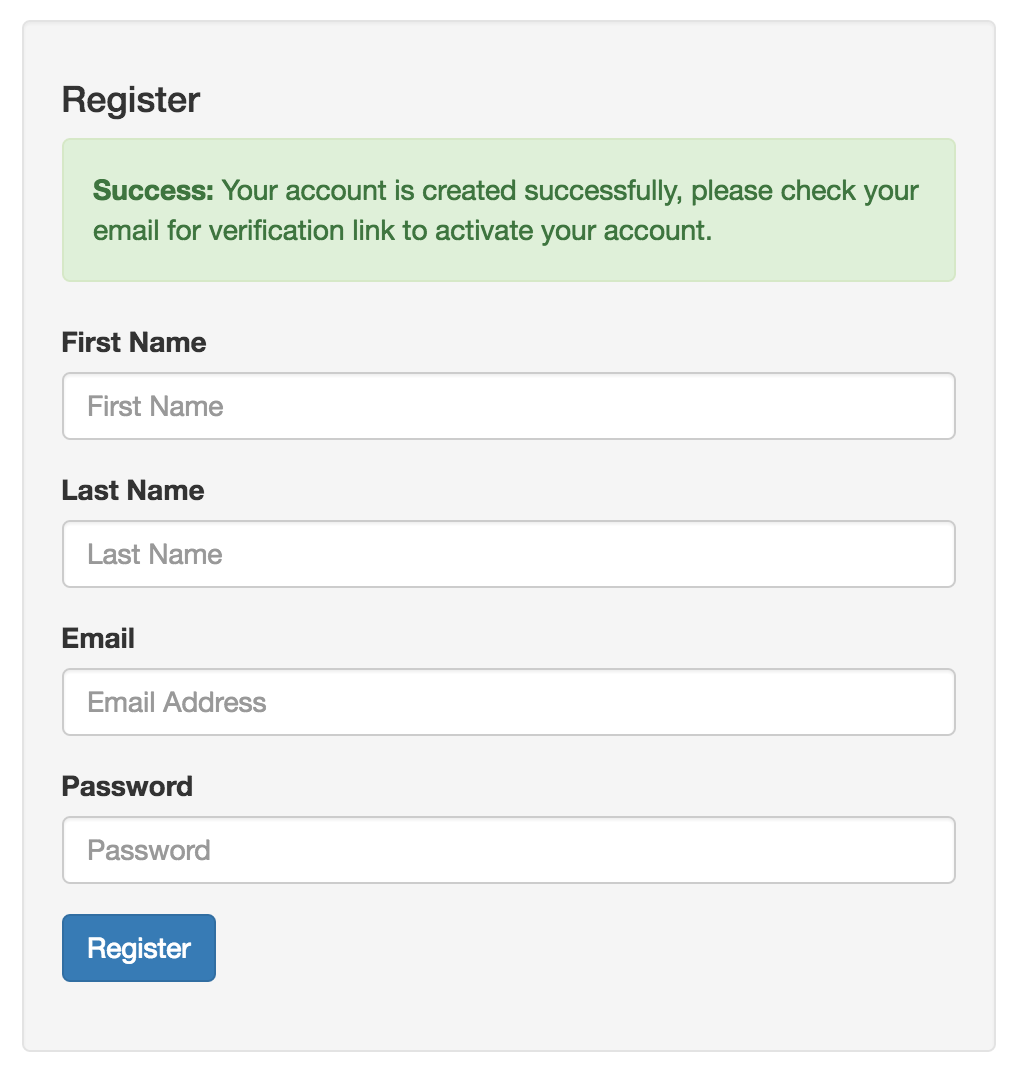
$register_success_message = 'Your account is created successfully, please check your email for verification link to activate your account.';
}
}
}
if you try to run the current code you should be able to create new user:
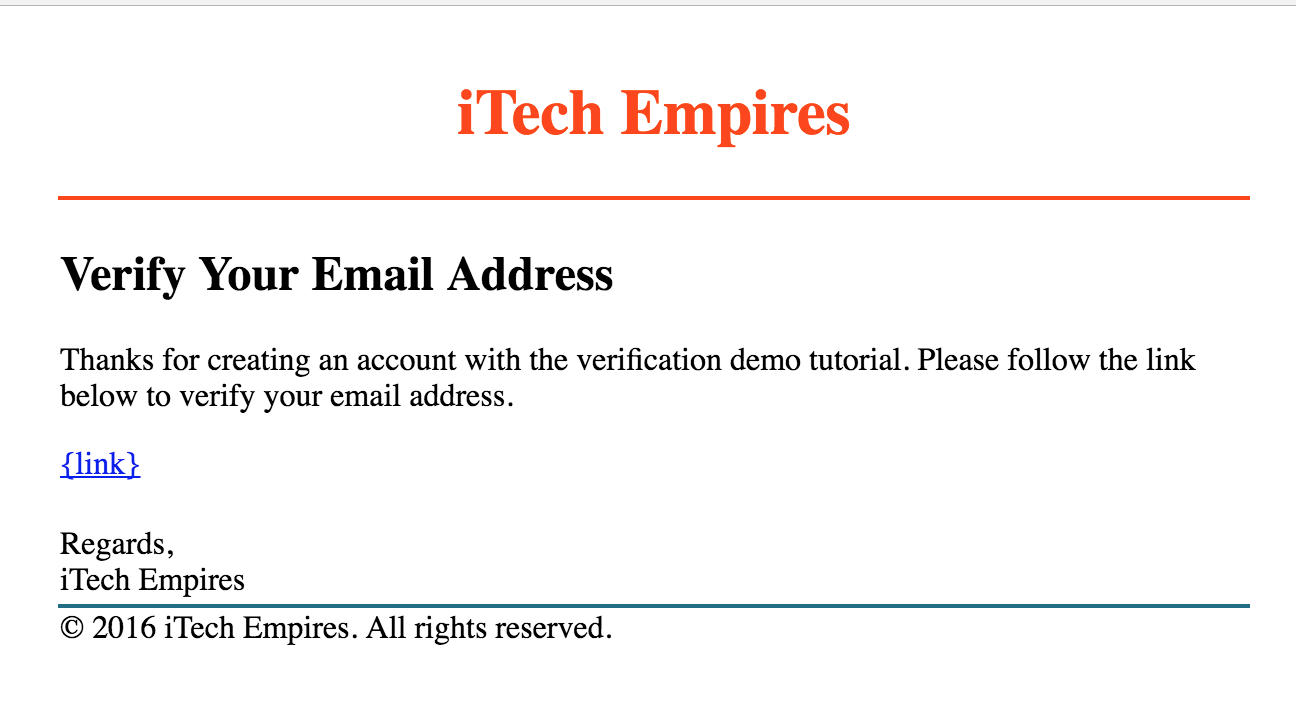
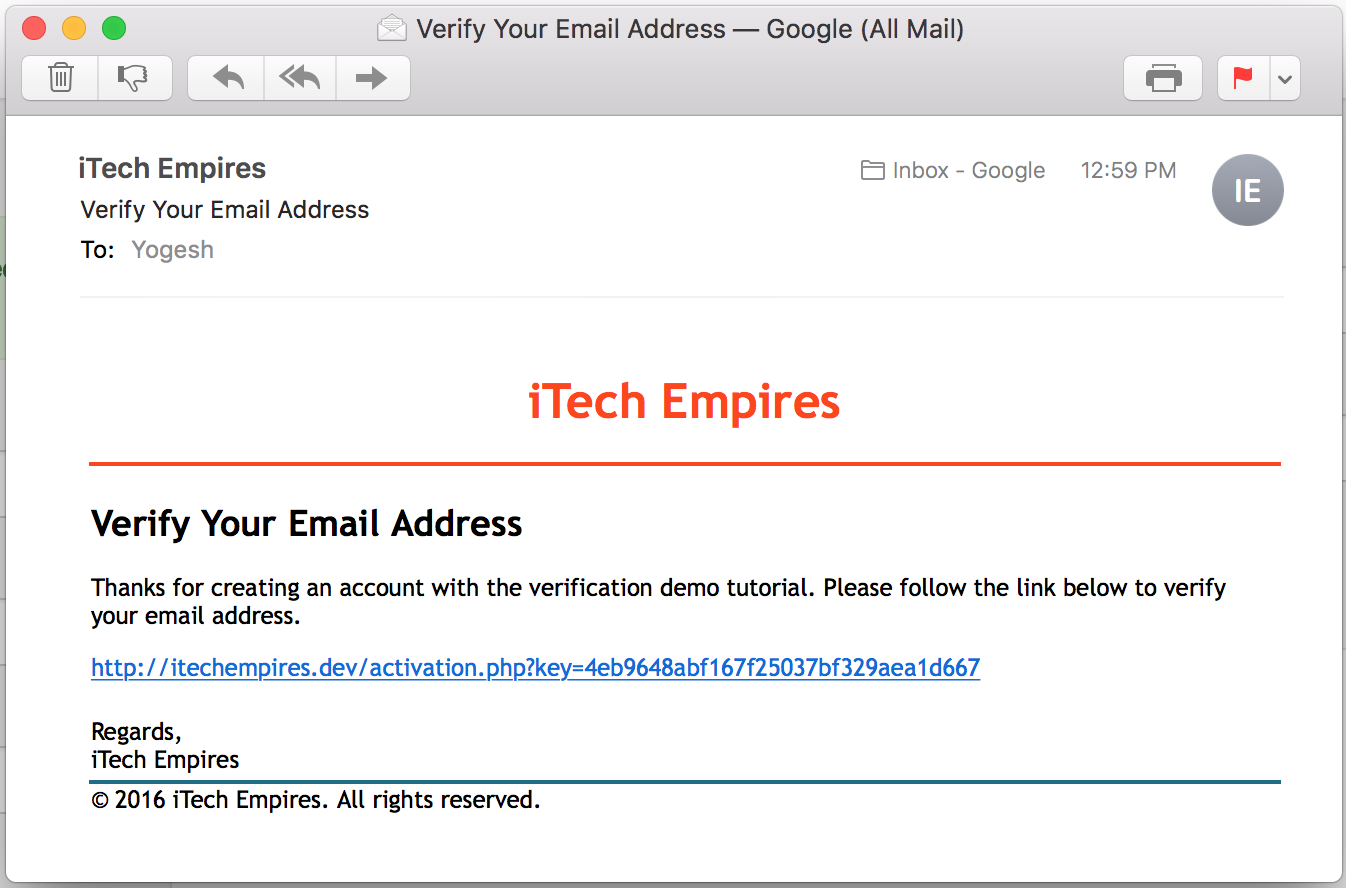
You should get the email similar following email into your mailbox, verification links key should be different as it is randomly generated from the script.
Step 8: Create Activation Page:
We have added the `activation.php` page into the email link now we need to create the page to handle the activation request.
activation page is going to access the input request from URL with the variable name called `key` and it is going to check the user associted and update the status field is equal to 1 to say it is activated.
if (!empty($_GET['key']) && isset($_GET['key'])) {

    if ($id != '') {

        // activate user
        $app->activateAccount($id);

        echo 'Your account is activated, please <a href="index.php">click here</a> to to login';

    } else {
        echo "Invalid activation key!";
    }

} else {
    echo "Invalid activation key!";
}
If you try to click on the email link to test, this page needs work and it is going to show you a following response:

We are almost done with the registration and activation part, let’s focus on to the login request.
Step 9: Handle Login Request:
Open up the `index.php` page into your editor and add following code to validate and handle the login request.
// check Login request
if (!empty($_POST['btnLogin'])) {

    $email = trim($_POST['email']);
    $password = trim($_POST['password']);

    if ($email == "") {
        $login_error_message = 'Email field is required!';
    } else if ($password == "") {
        $login_error_message = 'Password field is required!';
    } else if (!filter_var($email, FILTER_VALIDATE_EMAIL)) {
        $login_error_message = 'Invalid email address!';
    } else {

        // check email is valid
        if ($app->isEmail($email)) {

            // check password is valid
            if ($app->isValidPassword($email, $password)) {

                // check account is active
                if ($app->isActive($email)) {

                    // set session and redirect to the profile page
                    $_SESSION['user_id'] = $app->getUserIDByEmail($email); // Set Session
                    header("Location: profile.php"); // Redirect user to the profile.php

                } else {
                    $login_error_message = 'Your account is not activated yet, please check your email to activate your account!';
                }

            } else {
                $login_error_message = 'Invalid login password!';
            }

        } else {
            $login_error_message = 'Account is not exist with this email, please create new account to login!';
        }
    }
}
if you see the above code, we are validating the user with the several conditions, please keep in mind that this is just a part of code from our existing index.php page, so needs to call the library file again as we have already added on top of the page.
Step 10: Create Profile Page:
Create `profile.page` page to show user details and logout link:
// check user login
if (empty($_SESSION['user_id'])) {
    header("Location: index.php");
}
$user = $app->UserDetails($_SESSION['user_id']);
?>
<!doctype html>
<html lang="en">
<head>
    <meta charset="UTF-8">
    <title>Profile</title>
    <link rel="stylesheet" href="bootstrap-3.3.7-dist/css/bootstrap.min.css">
</head>
<body>

<div class="container">
    <div class="row">
        <div class="col-md-12">
            <h2>
                Account activation process with email verification using PHP, MySQL and Swiftmailer
            </h2>
        </div>
    </div>
    <div class="form-group">
        Note: This is demo version from iTech Empires tutorials.
    </div>
    <div class="row">
        <div class="col-md-12 well">
            <h4>User Profile</h4>

            <h4>Welcome <?php echo $user['first_name']; ?></h4>

            <p>Account Details:</p>

            <p>First Name: <?php echo $user['first_name']; ?></p>

            <p>Last Name <?php echo $user['last_name']; ?></p>

            <p>Email <?php echo $user['email']; ?></p>
            <br>
            Click here to <a href="logout.php">Logout</a>
        </div>
    </div>
</div>

</body>
</html>
Step 11: Logout page:
Finally use following script to create logout.php page to clear session and logout the user.
// start session
session_start();

// Destroy user session
unset($_SESSION['user_id']);

// Redirect to index.php page
header("Location: index.php");
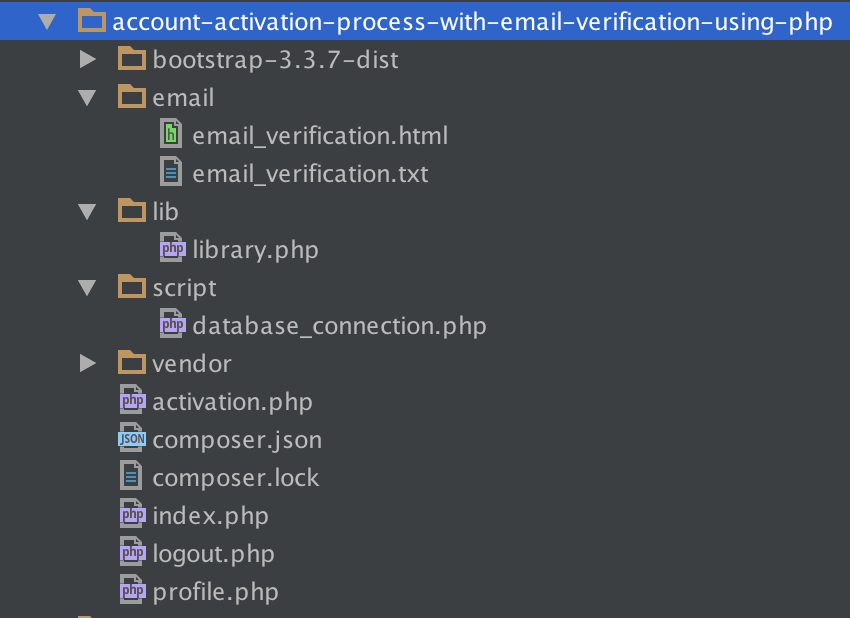
Tutorial Folder Structure:
We are done!
Next you can learn how you can provide change password feature for the active user from this tutorial Change User Password by Validating Current Password in PHP MySQL
If you get any question or issues related to this tutorial you can always let me know using comment box below or you can also send me a direct email using contact us page, thank you!

